Thursday, July 30, 2009

Viva la difference...

Two nights ago, I cut out the "floors" for the kayak. Bascially, I took the existing pattern, traced the bottom of it and offset the inside surface by the thickness of the slats which will be the actual seating and storage surface. They extend to just inside of the chine stringers. Fairly straightforward. I opted not to use a metal bracket the way Thomas Yost does - trying to keep things from looking "industrial". Basically, I'm looking for something I think is more aesthetically appealing and easier for students to make.


On the Sea Tour 15R, the cockpit opening is between frames #3 and #4 and in Yost's boats the only slats are between the frames with the top of the slat at the bottom inside edge of the frames. I'm doing this, but also adding more slats in the area behind the seat for gear storage. These slats are primarily intended to keep gear up out of any water that may accumulate in the bottom of the boat.

Last night, I sanded the "floors" and bonded them to the frames that make up the skeleton of the boat with thickened epoxy. The hardest part was spreading an even film of epoxy. I also removed the screws that were used during the assembly process. The holes were drilled up to a larger diameter (Ø 7/32") and Ø 3/16" dowels were bonded into the holes with polyurethane adhesive. These are put in to resist shear between the stringers and the frames.


Tonight I will clean up the slats of cherry that I will use for the seating and storage surface - 1" wide slats that are 3/8" thick where the paddler sits and 1/4" thick in the rear storage area. These will be spaced approximately 3/8" apart to allow for air/water flow and a lighter boat.

I've also begun thinking about the coaming and hatch cover and am not planning on using Yost's method of plywood framing in this area. There is a definite reason for this deviation. With Yost's method, there is a frame beneath the skin. When the kayak is inverted to get water out of the boat, some of the water will be trapped by dam created by the plywood. In traditional skin-on-frame kayaks, the coaming is actually stitched to the skin and floats, for lack of a better term.

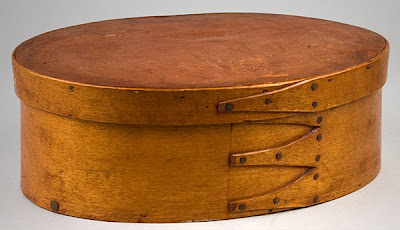
I'm still debating how I am going to accomplish what I want to with the coaming and hatch cover. My mental picture of what I want is a laminated rim like a Shaker oval box. The problem is that there were support blocks and the plywood rim which make an incredibly strong cockpit coaming in Yost's design.

A bit more of the Thotful Spot, perhaps.

Wednesday, July 29, 2009

Monday, July 27, 2009

God? Just a minute more, please.


I can identify with Noah tonight.

Let me paint the picture for you. During dinner, we'd been listening to thunder to the north of us and watching the gathering clouds. I'm itching to get out and work on the kayak. After a day of productive, but frustrating work in the office, I just need a few minutes to keep the progress ticking along. It's just after dinnertime and we've gotten DS and DD to bed, so I head out to the garage. Call me obsessive, if you will - I prefer 'dedicated'. With the amount of rainy days that we've had this summer, any opportunity to work on the kayak is a good opportunity.

The sky isn't looking promising - it looks like it should be about 9:00 PM, but it's not yet 8:00 PM. Thunder booms in the distance. I turn on the garage lights and the outside lights and pull out the stock and tools that I need to do my work. Mosquitoes begin to gather in large numbers to join me for my task. I've got my hearing protection on as I'm working, and am using the jig saw's light (and occasional flashes of lightning in the distance) to illuminate my work. The realization that I'm standing out in a relatively open space with a grounded power tool in my hands isn't making me feel good. Dare I say, not one of my more brilliant moves, but I've only got a little bit more to do.

My work for the evening was to cut out the "floors" that will go on either side of the frames in the kayak tonight. These floors will support slats that will make up both the cockpit and the storage area behind the cockpit. Its only 6 narrow pieces of plywood - not a big job.

The flashes of lightning are coming closer together and I can now hear the thunder regardless of the hearing protection that I'm wearing. A quick check of the sky shows some truly ominous looking roiling clouds churning their way overhead as the breeze freshens from the northwest.

Please - just one more floor, one more floor...

I guess that God must look out for fools and boatbuilders. Maybe they're synonymous?

The last frame is cut and I manage to put the tools and materials back in the garage. Rain starts falling immediately after I put the sawhorses away. It's now coming down in buckets and the thunder and lightning are playing across the horizon outside the window. In the nick of time.

Saturday, July 25, 2009

And a bit more progress...


Thursday evening, I managed to glue the majority of the frame together. Today, I took a bit of time to put the bow and stern together. Thomas Yost doesn't detail the shapes of the bow and stern. He gives instruction, but doesn't give profiles. I can't understand why this level of detail isn't in the plans, but I followed his instructions and this is what I finished up with at the bow:


While I'm not obsessing about the weight of the but, I added some holes to the stem and stern forms. I think they'll be fine structurally. At this point in the build, the weight of the frame is about 16 - 1/2 pounds. Floors, coaming, an access hatch and the skin are yet to be installed.


After I cut the first stern pattern, I decided that I wanted a slightly more plumb stern profile and re-made a new cardboard pattern. The picture above shows the result after tracing the cardboard onto the plywood and mounting it. I still have to remove the screws that were used to fixture the stringers to the frame and install the dowels that will prevent the stringers from breaking loose in shear.

There are a few things that I'm a bit uncertain about - the center stringer comes a bit low at the tip is one. This may or may not be intentional because of the skinning of the hull, and it may not matter at all.

Not bad after about 8 hours of work.

Wednesday, July 22, 2009

Tuesday, July 21, 2009

Tech Tip Tuesday


I don't know if any of you recall (or will admit) to having watched Magnum PI during the '80's. In the series, the lead character; Thomas Magnum who was played by Tom Sellick, used the narrative gimmick of his "little voice". The "little voice" would warn him when something wasn't quite right.

Well, I have that little voice in my head and you probably do, too. Last night as I was trying to align frames, my little voice said, "You're working way too hard at this." I had installed the sheer stringers and the frames and was starting to install the chine stringers. Every time that I put one in place, the frames would shift, and I couldn't be assured that the frames hadn't moved axially, or if they were vertical or square to the centerline of the kayak. I started to feel that things weren't going well and rather than make an irretrievable mistake, I retreated to my thotful spot. I mulled things for a while and then decided to sleep on things.

When you are boatbuilding, it should be fun. If it's not fun, you should be thinking about working smarter, not harder. Think about a new method. Do some research. Ask questions of someone else who has experience doing what you're doing.

In my case, after mulling things over, the "duh" moment came to me. I was thinking about the mounting of forms 1 and 6. I needed something to hold the rest of the frames in position, but I didn't need something that permenant - as a matter of fact, I don't want something that permenant. My big concern was that I could keep the forms vertical, perpendicular to the centerline and in position axially. One problem was that whatever I came up with couldn't obstruct the keel stringer that would be along the centerline. I also will need to be able to extract the supports after assembling all the stringers.

Here's the solution. It's a simple plywood cross - made from 3/4" thick plywood that slots together (tightly). The center of the cross is offset to allow clearance for the keel stringer. The horizontal member fits between the sheer and chine stringers. At the bottom of the cross is a piece of 2x2 that will allow the plywood cross to be mounted to the strongback. Here's one of the 4 that I made this evening.


It's not square, because it doesn't need to be - I'm only concerned that the surface that meets the floor is a flat. Tomorrow we find out if I out-smarted myself.

Monday, July 20, 2009

Some Progress


I managed to get my forms cut out of the Occume plywood. My friend got her forms cut out as well and took them home to sand and finish. This is a fairly straightforward process. We tried to approaches to cut the outer profile - a jig saw with a 20 TPI blade and a bandsaw. In lots of regards, I think the jigsaw was actually easier than the bandsaw as we lacked the throat depth on a 14" bandsaw to get at all of the features without using the jigsaw to finish. We used a 3/4" Forstener bit to clean out the corners on the inside and to allow us to start the cut on the inside of the frame where we used a jigsaw regardless of how we cut the outer profile.

After the forms were cut out, I took a 1/8" radius round-over bit in a palm router to ease the inside edges of the forms. I figure I don't want sharp corners where it may touch either the paddler or dry bags to avoid chafing and potential punctures. It will also help the finishing process. I also eased the sharp corners between the stringer notches with a little sandpaper. This is the end result.


I used the same 1/8" radius roundover bit to radius the corners of the stringers. Again, to keep from having sharp corners in contact with both the paddler and the Dacron skin that will cover the boat.

We also constructed two strongbacks - relatively simple - a 12' 2x4 for the top plate and another 8' 2x4 set on edge and screwed to the top plate to keep it from warping. On the top surface, the form locations were marked out. The two end mounts (rectangular pieces with a vertical slot in yesterday's post) were attached to the top of the beam using 2x4 blocks. It is important to remember that the forms are spaced to the same side, so one of the end mounts has to be offset by the thickness of the form stock - in this case 1/2". Here's one end of the strongback.


The strongback was placed on sawhorses and the form 1 and 6 were attached to the end mounts at the proper height, leveled from side-to side and clamped in place. Once this was done, the sheer stringers were installed using bungee cords. I was suspicious of the reason for bungees instead of clamps, but the bungess let the stringers slide. This isn't apparent unto the next step. Extra hands or clamps, however, are good for holding the stringers in place until you can put the bungees on. Unless you are an octopus, this is not easy. Here are forms 1 and 6 with the sheer stringers in place.


This next step is really made easy by this next tool - a Quick Grip clamp/spreader which when set up as a spreader will push the stringers apart so that you can install form 3 in between the stringers. It's a great tool.


The next step is to install the forms between the stringers and ensure that they are vertical, perpendicular to the centerline and at their correct spacing. Not that difficult really. Once this has been done, mark the stringers on either side of the form. After that is done, the chine stringers and the keel stringer are installed. Once I tried this, I had some issues I'll talk about later. Time to retreat to my thotful spot.


Well, at least there was a little progress this evening - not much, but a little.

Sunday, July 19, 2009

A New Project


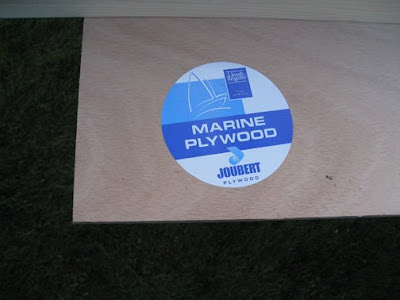
Here is the beginning - we're going to build two skin-on-frame kayaks based on Thomas Yost's Sea Tour 15R design with our own alterations. I've posted about this project earlier in this post. Well, we've finally gotten started. The picture above shows a lot, actually. There is this nice, very expensive sheet of 1/2" thick Occume Plywood. Good stuff, but at $145 a sheet, it had better be. For those of us not blessed to be near a supplier of marine-grade plywood, go to your local lumber yard and ask questions. We were able to buy this material through our local lumber yard for a minimal premium over what I could buy from Boulter Plywood and far cheaper than going to get it or having it shipped here.


On the plywood are some patterns that were laid out in the CAD system and printed out at my local office supply store. The patterns were laminated to some cardboard and cut out. There are patterns for both the kayak frames and stations that hold frames one and six to the strongback. Also, are two aluminum seat-post clamps that we intend to use for some home-made adjustable foot braces. Above the patterns and foot braces are a strongback made by screwing together two 2x4's . On the top of the picture is some beautiful 16' long select White Pine that has been
planed to 3/4" thick and cut into 1" and 1-1/2" wide stringers. What's lacking here, and I don't understand why, particularly is a form for the stem and stern. It would seem to me that these patterns could have easily been defined, but Thomas Yost leaves this bit of detail out and lets the builder define the shapes of their stem and stern.

I'm sure some of you are rolling your eyes at the choice of White Pine for stringers. It has some good and bad points. The good: it's inexpensive, relatively light-weight and relatively strong. The bad: it dents relatively easily, can bleed pitch and isn't particularly rot resistant. For a small light boat that will not "live" in the water, I'm not particularly concerned about rot resistance. If I was, I would choose Western Red Cedar, but as I noted, my friend who I'm helping here, is sensitive to Cedar dust.

Some of the variances that we are going to have from Mr. Yost's design include the addition of an access hatch on the back of the boat. We're thinking of something like the lid of a Shaker box that will be held closed with some straps and a buckle. Underneath the access hatch will be some slats to act as a floor in this area. Rather than use a plywood coaming, we're going to laminate several thicknesses of stock. Also, we plan to use a Dacron skin instead of PVC for a lighter boat.

With our prototype model to guide us, we're getting started.


Look for more updates to come in fits and starts as we progress.

Thursday, July 16, 2009

Am I Predictable?

I appear to have hung out a business sign. It reads as follows:

Doghouse Boatworks

Fine Small Boat Building
and Instruction
by Canoez

Someone has subtitled the sign. The hand-scrawled note says "Will build boats for beer."

How can I tell? Well... There hangs a tale.

The first year that I taught, my students were wrapping up their boats at one of the student's houses as we had run out of good weather days to finish the canoes during class time. Waiting after the end of our session was a cold Sam Adams. Nice after the work is done. It seems to carry on from there.

Last summer when I taught at WoodenBoat, one of my students was kind enough to have an assortment of nice Maine-brewed ales. An unexpected, but not unappreciated treat. Two of the other students who were staying over on the Saturday night later were took me over to the Brooklin Inn for a nice dinner out. Again, a nice, but unexpected surprise.

One of my other long-term students (He's taken the class for three years and has built two boats - a Sassafrass Wee Lassie (The Rootbeer Float) and a stretched version of the Wee Lassie that is being built as a decked sailing canoe in the style of the turn-of-the-century sailing canoes. I occasionally head over to his house to help him with some of the more advanced bits and pieces and after the work is wrapped up, we critique our work and plan for the upcoming tasks over - you guessed it - a cold ale.

Another student from last year's session who is an experienced woodworker needed some help with some glassing at his house over the summer. Like with the last student, a nice beer or ale after the work is done is on the list - or a nice bottle that seems to find it's way into my trunk, for some strange reason.

The most recent session of boat building wrapped up with a full-day session on my birthday - a cake was present for our 10:00 AM "union break" for coffee and donuts or the like along with a few nice bottles of Belgian ale. I'm sensing a pattern here, how about you?

For the last two nights, a friend of mine that is in a woodworking class that I take has been working with me on a skin-on-frame kayak. (More posts on that later as we've got more material to show.) Last night, she showed up holding a bag with the following contents:


I'm definitely seeing a pattern here.

Wednesday, July 15, 2009

Tuesday, July 14, 2009

WCHA Annual Assembly


Tomorrow is the opening day of the WCHA's 30th annual assembly at Keuka College in Keuka Park, NY. The assembly runs from the 15th through the 19th and is one of those events I haven't yet been to, but must get to one of these days. This year's focus is on canoe sailing and looks to be great fun.

The WCHA is, per their website :

A non-profit membership organization devoted to preserving, studying, building, restoring, and using wooden and bark canoes, and to disseminating information about canoeing heritage throughout the world.

The information and resources are not to be missed.

From the Mouths of Babes

DW sent me this one:

Q: Explain one of the processes by which water can be made safe to drink.

A: Flirtation makes water safe to drink because it removes large pollutants like grit, sand, dead sheep and canoeists.

Monday, July 13, 2009

Fantastic Plastic?


DD, my father and I took a paddle at a local state park this weekend - another three generation paddle. We took the same canoe that we did the weekend before - the 16' Wabnaki. We paddled a complete circuit of the pond and we saw many, many boats - easily 3 dozen boats. There was an inflatable, a few other canoes, but by far, most of the boats were small plastic rotomolded kayaks. We were the only wooden boat on the water.

Plastic boats certainly have their purpose. They're durable and take an incredible amount of abuse. They're also inexpensive. Because they are inexpensive, more people can afford to buy them and provide an easily accessable way to start paddling. Their shortness, "cute"-ness, bright crayon-like colors and low cost seem to be instrumental in making them popular.

There are some downsides, too. They are not always easily repairable. Some of them have bottoms which oil-can (Flopping up and down.) which effects paddling efficiency. Scratched up, they can look pretty horrid. They tend to be wide for their length and sometimes track poorly as they are short. Because of the roto-molded construction, they tend to be heavy - often 40-45 pounds for a 11' long kayak.

At the take-out, my father helped two women with these little plastic kayaks put them on their car. He was stunned to find that the little 12' long kayak weighed nearly as much as the 16' cedar-strip and 'glass canoe that we'd been paddling.

I really prefer wooden boats, but I can't disparage the plastic boats. (at least not too badly...) They introduce a lot of people to boating who otherwise might not get the chance. Getting out on the water is important. You have to start somewhere. Also, because of their limitations, they often lead people to better fiberglass, Kevlar, or wooden boats. I'm often surprised at how many of my students in my canoe-building class have started in little plastic kayaks or canoes.

However you do it, get out and paddle.

It's Monday Again

Back to the cubicle farm.


(People think we waste Post-it Notes...)

Sunday, July 12, 2009

Somebunny likes you.

I'm always amazed at the variety and relative boldness of our local wildlife. This morning, we were opening the kitchen windows to let in the glorious breeze outside to enjoy as we ate breakfast. As we did so, a rabbit came bounding across the yard towards the house. DW and I were talking at the time and the rabbit only came closer. We moved closer to the windows to watch and then called the children down to watch the rabbit. The critter was not disturbed in the least and continued to eat while we had our own breakfast remaining just outside the window for about 10-15 minutes until disturbed by something nearby.

To give you an idea of how close, take a look at the sequence of pictures:

DD and DS looking at the rabbit eating the clover growing in the garden.


Bunny eating the leaves off the Black-Eyed Susan.


Bunny checking us out. (While eating...)


It seems that the house and the windows/screens form this invisible wall for the animals that makes them think it is safe for them to approach.

Generally we don't mind our wildlife - except when the bear is upsetting the compost bin or the rabbit is eating the Liatris down to the nubs. Then again, we could have other problems!

Wednesday, July 8, 2009

Thanks, Carl!

Carl Cramer, WoodenBoat's publisher, has a weekly blog called "My Wooden Boat of the Week" that is an eclectic combination of information about the people, events and boats of the boating world. Here are some links to some posts that I found very interesting on his blog:

Windvinder
- A wind powered skin on frame catamaran that sails upwind!

Swallows and Amazons - about the boats that were Arthur Ransome's inspiration for his writing.

Kids in Boating - kids building their own plywood boats

Finally, this past week, Carl was kind enough to include Padding Upstream in his post regarding canoe building and the photographs taken at this year's WoodenBoat Show. Please be sure to bookmark or add Carl's blog to your RSS feed so that you can keep up with the wonderful information coming out of Brooklin and the rest of the world of wooden boating.

Wordless Wednesday


Tuesday, July 7, 2009

Three Generations in a Canoe

This past Sunday, we had my father and my great-aunt over for lunch and during lunch, both my father and I were looking out the window at the beautiful weather and discussing what a nice day it would be to go for a paddle. It was looking a bit breezy and cool, but after the rain that we've had of late, it was looking like a fantastic day by comparison.

After lunch and the clean-up that followed, I asked DS if he'd like to go for a padde with his Grampa. The response was wordless bouncing up and down in the kitchen. We grabbed paddles, life jackets and headed out the door.

Paddling with my dad can be an adventure - you have to decide which canoe from the livery that you're going to bring and where you want to go. Because it was nearly three in the afternoon, we opted for the easiest canoe to get at (A Wabnaki to Gil Gilpatrick's design) and the nearest destination - a pond in a local conservation area. This particular trip was planned with DS in mind - it's an easy walk in on a paved path and a boardwalk to a dock. (These are intended to give access to people visiting in a wheelchair.) We take advantage of the path and boardwalk by using a canoe cart to wheel the boat in - only about a 1/4 mile, but it beats portaging.

There are usually lots of things to see at this pond. There are usually frogs and turtles along the bank, dragonflies, beaver, red-winged blackbirds, herons and on occasion, hawks. Cat-tails grow in abundance along with lily pads, pickrel weed and water shield. In the spring, there are wild iris growing along the edges which are quite spectacular.

I hadn't been paddling at this particular place in two years and was astonished at how overgrown it was with vegetation and algae. Nearly 1/2 of the acreage of the pond was covered. There were spots you felt that you could just get out of the canoe and walk across the surface of the pond weeds to get to shore. It made for some difficult paddling in areas, but it was well worth it. The breeze kept the mosquitoes at bay and wasn't too strong for paddling. We did see a beaver making a hasty exit and some type of large bird of prey (osprey?) but no herons or hawks. Candian geese and mallard ducks were playing hide-and-seek in the tall grass along the water's edge.

It was a wonderful day and DS had a blast, although he didn't stop talking and asking questions the entire time. I'm sure we missed a bit of the more timid wildlife because of it, but it was OK. Next time , it'll be DD's turn for a three-generation paddle!

Saturday, July 4, 2009

Happy 4th of July!

WoodenBoat Show : Part 6


For those of you with a real varnish deficiency, pay attention. The boats below were in the I-Built-It-Myself section on the green at the Seaport. I understand from others that this display was a bit fluid as boats arrived and left throughout the show's three day span. There were some interesting and detailed kayaks:


Love the very blond finish and the checkerboard look to the rim:


An overview of the same kayak. Note the carving on the bow.

Then, if you like brightwork upkeep, there was Tenderness. Tenderness is a Penobscot 14 and was well built and finished. I do have to say, however, that I wouldn't want to be the first one to put a scratch in her.


The glossy varnish work which was well-done, was a very big crowd magnet. You can see the number of people standing around admiring the work.


This was probably the most difficult picture that I took at the show - Tenderness without a crowd. I wanted to get an unobstructed overall view and it took me nearly 10 minutes to get. Note that the exterior finishing job is as good as the interior work. Even though it may look it, the hull is not dirty, that's the reflection of the grass and the stand that she's on!


The variety of boats on display was impressive. There was a wooden pontoon boat, a fishing boat, numerous canoes and kayaks. Several dinghys and pulling boats - pretty much something for all tastes. A not-to-miss part of the show!


Still, all good things must come to an end. Time to pack up the shop truck for the ride back to Brooklin!

Thursday, July 2, 2009

WoodenBoat Show : Part 5

Tonight I'm taking a little break - I've been cutting out paper patterns glued to cardboard to be used as templates for the skin-on-frame kayaks I'm going to be building. At the moment, my thumb is a bit numb from using the scissors. A bit more cutting remains, but I'm getting tired and don't want to mess them up.

Tonight's treat is a set of links to Soundbounder by Matthew Housekeeper. He has a very nice blog on topics regarding the Long Island Sound and the surrounding area. Matthew was in the enviable position to be on a boat in Mystic watching some of the boats arriving at the seaport for the WoodenBoat Show.

Enjoy!

Parade of Sail


Parade of Power

Wednesday, July 1, 2009

WoodenBoat Show : Part 4

Personally, I find that one of the great treats of having the WoodenBoat Show at Mystic is being able to go and have a good wander around in the Rossi Mill Building. For those who aren't familiar, the Rossi Mill is where Mystic Seaport stores all of those artifacts that they don't have room for in their exhibits. It's basically like your grandparent's attic - a bit dirty and dark - but packed. Those historical tidbids that are locked away in that attic are precious and beautiful in their own way. Typically, admission to the Rossi Mill archives are by appointment only so this is a real treat. In my opinion, this is an under-attended part of the show. I apologize if the pictures are a bit difficult to see - it's hard to get good pictures in there.

This gives you a good idea of the environment:


Boats are stacked up three and four high on racks and every which-way that they can manage to get them in. There are also rowing shells, engines of various varieties, and other nautical artifacts.

This little gem is Butternut, a lapstrake double-paddle sailing canoe designed and built by Pete Culler. Remember the list?


All of the boats are kept in the condition that they were originally donated to the collection for good or for bad. Tags identify the year that the boat was acquired and a number which identifies the order in which they came in that year. Chipped paint, rot, torn canvas, and deteriorating finish is all part of the charm. Here's a bit of alligatored varnish I came across:


Compare the picture below to yesterday's post - just some new canvas and a bit of varnish...


I enjoy finding little treasures like the deck below - they are good examples for my students to look at when they're thinking about how to finish their own canoes.


This is Kestrel, a sailing canoe designed by W.P. Stevens. One of the very early canoes raced in ACA racing.


Below is a Rushton Nomad sailing canoe with flush lap construction. These canoes were built without canvas and depended on the varnish and the skill of the builder to keep the laps watertight !


So many treasures, so little time.