...Teaser.
Yup. This is here to torment you.
One of the things that my students find to be difficult to do is to accurately cut the compound angles where the stringers meet the stems on the skin-on-frame boats. Mostly, my students lack much understanding of woodworking when they arrive in my class and complex angle cutting is not an easy one for experienced woodworkers.
So, I've developed a jig to cut the stringers. It is simple, and straight-forward and saves lots of time. We cut one set of stringers with it last week and I've got a couple of tweaks to make before I show it to you. I can think of several different applications where this method would make things easier, so look forward to this technique appearing in other places.
Showing posts with label skin-on-frame. Show all posts
Showing posts with label skin-on-frame. Show all posts
Tuesday, January 14, 2014

Monday, July 8, 2013
You've GOT to be kidding me!

When we build boats, we're trying to build boats that are beautiful and functional in their own way. Some are work boat finishes, some are varnish queens - it runs the gamut, really. It's pretty rare to have a really awful looking boat. While my students are building boats, they are all way, way too critical of their own boats, but when exhibition finally rolls around, they are amazed at the ooh's, aaahh's, smiles and slack-jawed awe by the visitors who have come to see their work. I think this is a great thing as it really helps build their pride in what they have done.
However, at the exhibition this year and at the WoodenBoat show at Mystic, I was disturbed to hear a refrain that I hear all too often.
"That's too pretty to put in the water!"
WHAT?
You've GOT to be kidding me!
The following quote is probably the best response to those who say that the boats are too pretty to put in the water -
A ship is safe in harbor, but that's not what ships are for.
-William Shedd
The canoes and kayaks, rowboats, sailboats and motorboats that were built were to go places and do things. While some rare boats certainly deserve to be put on display or held by museums, for the most part, boats are meant to be used. Careful maintenance and repair can extend their lives, but boats - particularly wooden boats - have a finite lifespan.
The cedar strip and fiberglass canoes and kayaks that were built in my class were certainly built to be used. What people don't know is that they're really much more durable than they might be led to believe. I've dropped my canoe, banged into a metal railing with it, scratched it on rocks and gravel and other such indignities that a small canoe will be subject to. But you know what? I know how it was built and as such I know how to repair any damage. Usual maintenance for this kind of boat is a wet sanding and a fresh coat of UV filtering varnish. Maybe some new cane for the seat or a little polish of the brass or bronze bits. When freshly refinished, many people would assume that the boat was new.
Nick Schade of Guillemot Kayaks was up at the WoodenBoat School last year with one of his kayaks. As we prepared to go out for a paddle his shop assistant commented on how beat up the bottom was. He commented that he uses his boats and will clean them up like I described above once in a while, but that he built the boat to have fun with. From the scratches it was obvious that he did have lots of fun with it.
Still, just because you have fun with your boats, doesn't mean you don't cringe a little when you hear the formation of a new scatch.
Skin boats are a slightly different kettle of fish - they're still remarkably durable, but you do have to utilize some care - really sharp things are a problem, but for the most part, are surprisingly durable as a video in a previous post shows. I've been amazed by the durability of these boats to take a beating and not show it. I've launched my kayak on beaches with barnacle-covered rocks and debris, I've watched rocks deform the skin as I've passed over them in shallow water. I've not had a leak or a significant scratch even though I don't "baby" the boat.
So, build a beautiful wooden boat or skin boat - and use it!
Sunday, June 9, 2013
Exhibition 2013
Saturday dawned a much nicer, sunnier day and our collective disposition was much better. So, without further ado, here are some of the pictures:
Placed out front is the Genny - a 15' Solo Portage design from Rob Macks at Laughing Loon that was built by a former student with my help - it was kind of his master's level project in boatbuilding. The hull is 3/16" thick Northern White Cedar. Feature strip and trim are Walnut - both American and Peruvian.

Decks are crotched Walnut burl.

It's a stunning canoe and well made, to boot.
Hiding behind that is the modified Sea Tour 15 that I finished last year as an example of what is possible. I've been enjoying it and the speed and durability of the skin boat. It always seems to draw interest. It still doesn't have a name. I've been thinking of the Banana Boat and painting a huge blue Chiquita sticker on the deck.

Hidden behind is the other stripper that was made by the student who built the Genny. This canoe, the Harpoon, was built in the class and is a Wee Lassie II designed by Mac McCarthy of Feather Canoes. Trim is Ash, Walnut, and Butternut and the hull is 1/4" thick Western Red Cedar. The ropes that you see are for a foot bar and allow for quick adjustment for different paddlers. Should you be looking for a canoe, it is for sale.

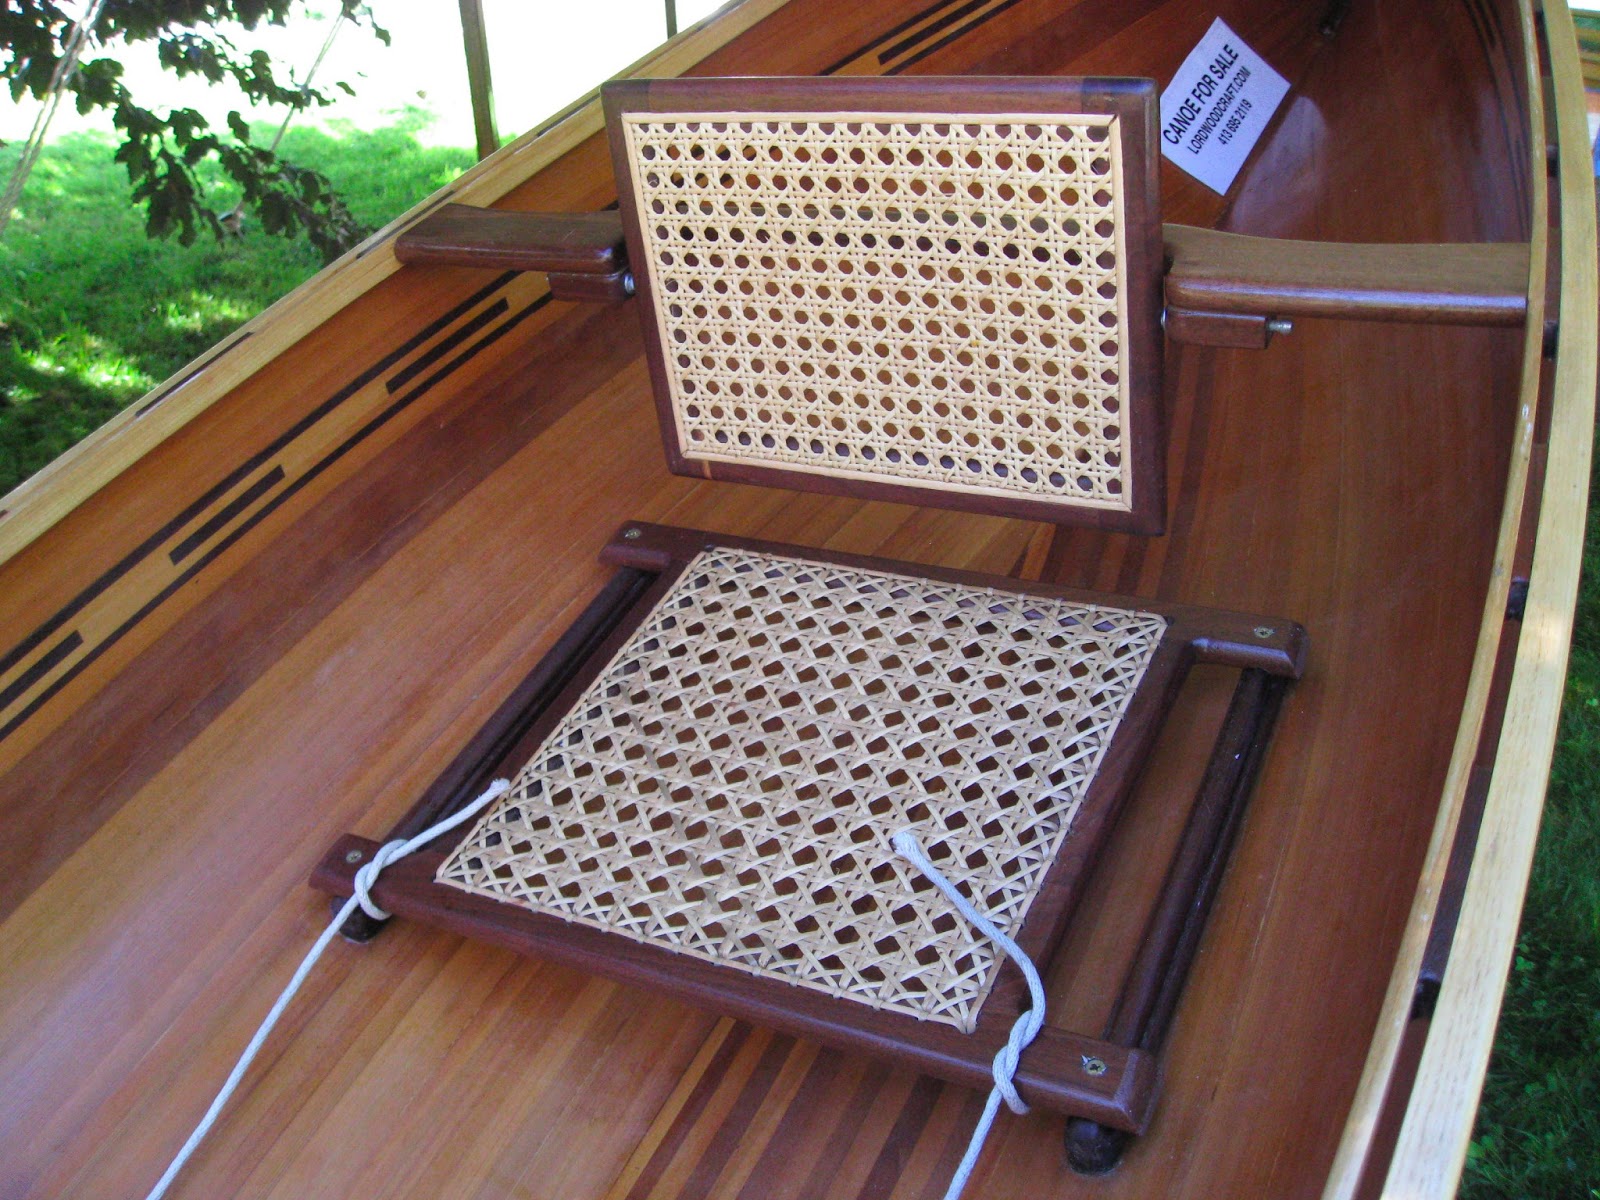
This is a detail of the seating area - a clever solution to remove the seat-back. There are barrel catches that are both the seat pivots and let the back be removable for transport.
At the beginning of the year, we offered three different designs to the students. They were the Stonefly canoe by S. Jeff Horton of Kudzucraft, and the Chuckanut 12 and Chuckanut 15 from Dave Gentry of Gentry Custom Boats. I figured we'd have a "little of this" and a "little of that" in the class, but we ended up with 7 of the Stonefly canoes and one of the Chuckanut 15's.
Here is one of the more interesting paint jobs that I've seen put on the canoes so far. The owner is a talented woodworker in his own right, and has done an outstanding job on the woodwork. I guess I shouldn't have been surprised about the creativity of the paintwork.

He was just applying the trim at exhibition. Today was another beautiful day, I hope he got a chance to paddle it.
This one is by a woman who started the class with somewhat more limited skills, but still has created a very beautiful boat. While we bond and screw or peg the stringers to the frames, she chose to add a more traditional touch by adding cosmetic lashings to all the joints as well as lashing the floorboards. (All of the students lash the floors to the frame...)

Scupper blocks, decks and rub rails will be from Walnut and the contrast with the Western Red Cedar frame are stunning. We hope to skin this boat this week.
This boat is being built by a fellow who has been developing his woodworking skills at the school and has done a splendid job of building his canoe. I'm really looking forward to seeing the decks in the sunlight - they're figured English Chestnut.

This boat was built by a student who was enthusiastic to build a light-weight canoe to use in the Adirondacks. He's made some unique choices during the build regarding his scupper blocks and has done a nice job with it. The brilliant red should be very visible on the water!

This is a unique canoe for us - it was done with White Pine stringers (like the yellow kayak) and is very pretty with the blonde wood.

Decks are Bird's Eye Maple and this boat has a sculpted backrest.


This is the lone Chuckanut 15. The gentleman who was building the kayak is 82 years young and is building the kayak to share with his grandchildren. The colors were selected to represent the college colors of some of the grandchildren.

Oh, yeah - he also built two paddles - one of which is in the picture.
Two canoes were MIA. One belongs to a student who gets around by bicycle - and plans to haul the canoe on a trailer behind the canoe, but had difficulty getting it back for exhibition because of this fact. The other belongs to a builder who had some serious changes in his life that occurred during the class and has moved to New York. He had come up to stay with myself and my family and work on his canoe. He'd applied finish to the frame and it wasn't dry enough to exhibit - a typical issue at boat shows - you can almost smell the varnish factory. Still, by the end of this weekend, the frame was varnished, decks and thwarts installed and the floors ready to lash in place. From there, just skin and trim. I hope to have pictures from the group launch party of these two boats.
During the course of the class, we discovered that the Stonefly design had a small issue because of some of the way we chose to finish the gunwales and decks. There was a slight "hourglass" shape that appeared in the aft end of the canoe. So, I decided that I'd like to change the design of the aft frame to get rid of this curvature. However before I turn this loose on the students, I figured I'd better build one. Here it is:

I went with Mahogany for floorboards and trim. I like the traditional shapes from wood and canvas canoes and took some cues from the class I took with Jerry Stelmok in tapering the gunwales and the shapes for the decks - curved with a hollow back - and the brass stem band and painter loop on bow and stern.

I have to admit that I had a bit of fun with the back rest. It is a curved pivoting back-rest with some stars carved into the top of the cross-member. I painted them gold before varnishing. I thought it came out rather nicely.

One of my concerns when I started this class was that the boats wouldn't have the same aesthetic appeal that the cedar strip canoes did. I had a set of clipboard out that visitors could leave contact information and be reminded of the sign-up for our next session in the fall - I have two full pages of folks who were interested in building a boat. I guess I didn't need to worry!
Tuesday, March 26, 2013
Tech Tip Tuesday
In the better interests of time and the sanity of both students' and the instructor's fragile faculties, I decided to forgo the sewing of the skins that was used to build the kayaks last year was not the best option for skinning the hulls in this class.
So, you ask - how are we doing this?

Staples.
The sewing class that was going on upstairs was interested to see how we were sewing the skins on the kayak and were somewhat bewildered and disappointed to find us stapling the fabric to the hull. This isn't that odd, really. When canvasing a canoe, folks use either canoe tacks or staples to fasten the canvas to the hull. We're doing pretty much the same.
Note that we're not using just any staples - we're using stainless steel staples 3/8" long. The fabric for the skinning is 8oz polyester from Dyson Baidarka & Company in Bellingham, Washington. I like the way this fabric works, frankly.
The procedure is pretty straightforward. With the boat upside down (or right-side-up if you're doing a deck...) we draped the hull with fabric and get it centered and aligned before we tack it in place at the sheer with thumb tacks. We then take the staple gun and start to make a closely spaced row of staples through the fabric about 1/8" away from the top edge of the sheer in the middle of the hull about a foot long, pulling towards bow and stern to keep fabric taut. We then pull the fabric taut around the boat and staple at 1/8" away from the sheer at the other side. By closely spaced, I'm talking about an inch apart - sometimes less.
When we get near the ends, we cut down the middle of the fabric from the end of the fabric toward the stem, aligned with the keel. I then seal the cut ends with a small butane torch - a very quick pass is all that is required. We'll give you an object lesson why later... The fabric is then pulled around the stem, stapling from the keel towards the sheer. Excess fabric is cut away at the far edge of the stem and sealed. The process is repeated with the other side of the fabric at the stem and then repeated at the other end of the boat.
When the sheer and the stems have been trimmed and sealed with the torch to prevent fraying, we put a little bit of thickened epoxy over the stems to help seal them and to smooth out any bumps and edges. When done, the boat looks like this:


So, you ask - how are we doing this?

Staples.
The sewing class that was going on upstairs was interested to see how we were sewing the skins on the kayak and were somewhat bewildered and disappointed to find us stapling the fabric to the hull. This isn't that odd, really. When canvasing a canoe, folks use either canoe tacks or staples to fasten the canvas to the hull. We're doing pretty much the same.
Note that we're not using just any staples - we're using stainless steel staples 3/8" long. The fabric for the skinning is 8oz polyester from Dyson Baidarka & Company in Bellingham, Washington. I like the way this fabric works, frankly.
The procedure is pretty straightforward. With the boat upside down (or right-side-up if you're doing a deck...) we draped the hull with fabric and get it centered and aligned before we tack it in place at the sheer with thumb tacks. We then take the staple gun and start to make a closely spaced row of staples through the fabric about 1/8" away from the top edge of the sheer in the middle of the hull about a foot long, pulling towards bow and stern to keep fabric taut. We then pull the fabric taut around the boat and staple at 1/8" away from the sheer at the other side. By closely spaced, I'm talking about an inch apart - sometimes less.
When we get near the ends, we cut down the middle of the fabric from the end of the fabric toward the stem, aligned with the keel. I then seal the cut ends with a small butane torch - a very quick pass is all that is required. We'll give you an object lesson why later... The fabric is then pulled around the stem, stapling from the keel towards the sheer. Excess fabric is cut away at the far edge of the stem and sealed. The process is repeated with the other side of the fabric at the stem and then repeated at the other end of the boat.
When the sheer and the stems have been trimmed and sealed with the torch to prevent fraying, we put a little bit of thickened epoxy over the stems to help seal them and to smooth out any bumps and edges. When done, the boat looks like this:

Stems look like this:

Because this boat is a kayak, we'll put the deck skin on at the next class. We'll then steam-iron out any wrinkles in the fabric before draining the water and setting the sole temperature to 450°F (with a digital meat thermometer) to shrink it a bit. At this point, the skinning would be done for a canoe and the boat ready for paint. In this case, it is a kayak and will get a deck skin, too.
Oh - I mentioned that I'd talk about why a quick pass with the torch is all you need. The torch is VERY hot and I usually just sort of wave it past the cut edge of the fabric to keep it from fraying. The student was doing this and may have had a momentary distraction or bit of inattention. He got a surprise:

The surprise was a pretty large hole over the sheer clamp. As you can see, we added a few staples at the sheer and the edge of the hole and put a bit of the thickened epoxy on it. Fortunately it is in an area that will be covered by a rub rail, so it won't be seen and is high enough so that water will not be an issue. WHEW!
More on the deck skinning in a bit.
Monday, March 4, 2013

Tuesday, February 5, 2013
Tech Tip Tuesday

Class has been ticking along with the students getting their frames near completion. The canoe plans came from S. Jeff Horton's book on skin-on-frame building that's available on Amazon - he's even got a second book available.
Before you take issue with what I write here and think that I'm throwing Jeff "under the bus" as it were, I'm not. I think he does some interesting things and offers some good designs, but I think he lacks some experience with other canoe building traditions. Even he states that he's not really a "canoe guy" and I think that hampers him in designing a skin-on-frame canoe. I do think that for our application, we've made some improvements to the design in terms of functionality and aesthetics.
He's got what looks to be a great shape for the canoe, but I take issue with a few of his construction details. First, in his design, he notches the bottom of the frames where a plank boat would have garboards to put in floors. First, the notching weakens the frames significantly. While Jeff shows a slightly raised seat in his design, we really want the paddler to sit as low as possible in the canoe. This would have the paddler's butt in any water that might be on the floor if they were sitting that low. Last but not least, the fabric rides right on the floors, which doesn't allow the fabric to flex over obstacles that you might encounter in the water, resulting in potential damage to the skin.
To avoid these issues, we didn't notch the frames and will lash a floor to the top of the frames which I think will be a practical and more attractive solution. It should look very much like "duckboards" used to in a traditional canoe.
The other thing that I've been thinking about for quite some time is how to make the gunwales more traditional in their appearance. When building a wood and canvas canoe, the ends of the inwale and outwale often have a graceful taper to them and the stem is mortised to allow the gunwale to pass by and give a nice triangular area for the deck to sit within.
On Jeff's canoe, he has the deck as a "cap deck" which lets him hide the fact that the inwales aren't well fitted. He claims that this type of woodwork is beyond most, but I think that's a little simplistic. To be honest, I've been thinking about this for a while and last weekend, we made a test cut on the first boat.
We started by placing the inwale in place and clamping it to the end of the stem. We made a horizontal mark at the bottom of the inwale. We also marked the centerline of the stem face. Using a bevel gage, we took the angle that the inwale met the stem and marked from the centerline to outside faces. A vertical line completes the marking.

Using a handsaw, we roughed away the material and finished with a chisel. Here is the result:

The next step was to take the inwale and taper it from a 1/8" thickness at the end of the stem to full thickness at the first form. We repeated this for the outwale and made a tapered spacer that went between the inwale and outwale. The length of the spacer was such that the thickness of the outwale was 7/16" where the spacer ended. There is an important reason for this - we'll be using 3/8" long staples to attach the fabric to the outwales and don't want the staples poking though into the scupper openings.

I think that the tapered ends look very nice. We still have a bit to go on this idea yet - Jeff's scupper blocks were irregularly spaced, so we're going to deal with that. To do that we'll cut down the frames by about half an inch or so in order to hide them with pieces of the Western Red Cedar used for the gunwales allowing us to make more uniformly spaced scuppers. Also, the stem ends will be cut down and the breasthooks tips will be notched underneath to allow only the deck to be seen, not the end of the stem frame.
More to come!
Saturday, November 3, 2012
Slow, but steady progress.
Preparation is half of boat building. The students in my class have been working diligently preparing materials to assemble into skin-on-frame boats. We started with a half sheet of marine grade plywood and some western red cedar and pine lumber. Using a set of master patterns (the light colored parts on the table), they traced the outlines of the shapes onto the ply.


Then, they rough cut the outlines using jigsaws and bandsaws and cut the notches for the stringers.

Once the outlines were rough cut, we used carpet tape to bond the master patterns to the rough cut frame. We then used a pattern bit in the router table to make the pieces that the students were making exactly the same as the patterns.

After the frames have been cut, a finish fit is made for the stringers with a fine rasp.

Once the notches have been fitted, a test piece should fit smoothly into the notches.

The stringers were cut on the table saw. We used full length pieces, but shorter pieces could have been scarfed together to make stringers of the appropriate length. Once the stringers were cut, we used a router to round over the corners where appropriate. This is for two reasons - to put a better finish on the stringers (finish thins out on sharp corners) and to put a rounded edge to protect the fabric that will be stretched over the frame.

Finally, we've assembled the strongbacks to build the boats on. (Note the sawhorses from the previous posts.) We've built a few new strongbacks, will try to re-use some old ones and 2x4's that are recommended for this build method.

Frames go together quickly once the material is prepped. I expect to be able to show some mostly finished frames after next week's class.
Wednesday, May 9, 2012
Tuesday, May 1, 2012
Tech Tip Tuesday

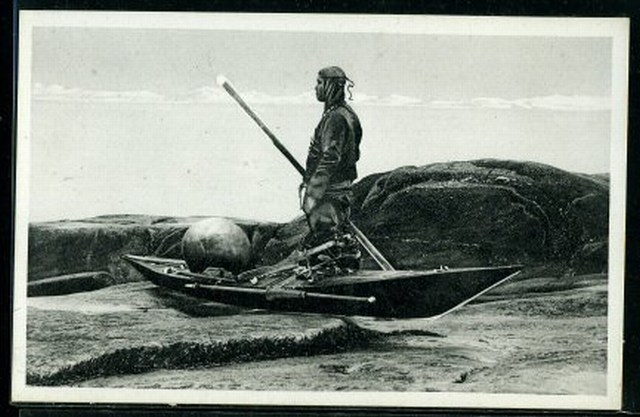
To quote Steven Stills, "Well there's things I am and there are things I'm not..." I don't think of myself as generally being good with a needle and thread. Boat tailor? I guess that's now a "thing that I am". Let me just say, there is a lot of needle and thread work in the boat on the right.
First, I have to say, the process of skinning the kayak was not difficult once we had things all figured out. It is time consuming and what information that I found was somewhat poorly illustrated or explained. I think it has a lot to do with the fact that it's something that you really need to see.
In our case, the process started out with the frame. For finish on the frame, we opted for a polyurethane finish as opposed to an oiled finish as some people choose to do. We then applied wax to the frame (I refer you to my previous bout with Murphy...) and polished it. The reason for waxing the frame is so the fabric not to stick to the frame when coated after skinning. At any rate, we started with the frame upside down:

We then used a piece of 8 oz Dacron cloth to cover the boat. The Dacron was selected over Nylon because it will shrink a bit when heated which lets you get wrinkles out at the end of the process - more about that later. We simply folded it in half length-wise and laid it over the hull to center it. We then used some thumbtacks to keep things in position. We then pulled down a bit and tacked at the sheer clamp on both sides - on the bottom in the image below. We then basted the cloth together at both the stem and stern to make a small, temporary pocket at either end while the cloth was being pulled tight from stem to stern. (FYI : This cloth is available from George Dyson at Dyson, Baidarka & Company in Bellingham, Washington. Mr. Dyson does most of his business by phone and is easily found with a web search. He does have a Facebook page with contact info, but not a web site. )

We then rolled the boat right side up. For the next step, there are no pictures because our hands were full. I can probably explain it better, anyway. We took a long thin strip of wood - 1-1/4" wide and 1/8" thick and as long as the boat. This was temporarily lashed to the top of the frame and carefully centered. We then pulled the fabric from one half of the boat over the strip and cut the fabric along the far edge of the strip from one end of the boat to the other. This meant that I wound up with a piece of fabric that was half the width of the boat plus 3/4 of an inch. We then used a small butane torch to melt the edge of the fabric so that it would not fray. We then repeated the process for the other side of the boat. Note that whenever you cut the fabric you should always seal the edges.
At this point, I was concerned that the amount that we would not get the fabric tight enough. I was also concerned about avoiding excessive pulls in the weave as it is a fairly loose weave. We'd seen some pulling around the thumb tacks if we tried to stretch the fabric too hard or un-evenly from side to side. To avoid pulling too many large holes, we opted for a method that many others have used. They sew a piece of nylon line into the edges so they can pull on the nylon line, not the fabric. This distributes the tension and gives a neat, finished appearance to the deck seam.
To do this, we cut two pieces of braided 1/8" nylon line that were just longer than the boat. Using small brads, we tacked them at the very tip of the bow, centered, but about 3/8" apart. Pulling tightly, we then tacked them - again, centered, but 3/8" apart at the stern. I then used hemostats (locking clamps picked up at a local "bargain store") to spread the lines at the front and rear of the cockpit opening to about 5/8" wide. This resulted in the line spacing being "tapered" from center to ends. The logic here is that we will fold the cloth over the top of the line so that we wind up with a deliberate gap. As we stitch the two halves together, the cloth is pulled tight, closing the gap at the same time.

The cloth is wrapped over the line and basted with a running stitch using a straight needle. Because we didn't want the stitches to show, we used white Dacron thread. The stitches are about 1/4" long and very tight to the line. This was done on both sides from the edge of the cockpit opening to the bow and from the cockpit opening to the stern. Note the gap between the two sides here.

To stitch the deck together I opted to get waxed artificial sinew. It's available from leather working and craft shops. It is a synthetic thread with high strength and is available in a variety of colors. I bought "natural" which is a yellowy-tan.
The deck stitching is accomplished with curved needles. I think it would be either nearly impossible, or simply very difficult with straight ones. Be sure to get needles with a large eye as the waxed sinew is challenging to thread through the needle.

Starting about 1/2" back from the bow, I took a single length of the sinew with a needle at each end and came up from the bottom of the fabric just passing through the outside edge of the nylon line. on both sides. This hid the start under the fabric. You then start stitching diagonally across the gap, staying just on the outside of the nylon line (so the needle touches it!) You repeat with the other needle and you get a crossed pattern like this:

The stitches are about 3/8" long. You can see at the top of the picture how it pulls the fabric together. You can also just make out the turned under edge of the cloth on both sides of the seam. This cross stitching stops about 1/4" inside the cockpit rim (when put in place) You pull the gap up tight as you're stitching. The final stitches should go through the nylon line to hold things in place. This prevents the fabric from sliding along the nylon line. This process was repeated from the stern to the back of the hatch rim.
Ahh... The hatch rim and coaming. We drilled a series of small holes - big enough to pass the needle and thread - about 1" apart all the way around both the hatch rim and the coaming 3/8" up from the bottom. We located the rim and the coaming at the edges of the cross hatch and noted that there would be a small - maybe 4" section of center seam between the coaming and the hatch. We stitched it so it just came 3/8" into both the hatch opening and the coaming opening, stitching through the nylon line at either end. To re-cap here, we've got three sections of the deck seam completed so they end 3/8" inside the frames for the hatch and coaming.
We then cut the fabric at the stem and stern leaving 1/2" extra fabric. The brads holding the nylong line and the basting stitches were removed and the edges were tucked inside the hull along the sides of the stem and stern being careful to keep a straight edge along the stem forms about 3/8" apart. Starting where the cross-stitching ended at the tip of the deck, I cross-stitched the folded edges of the fabric together until I reached the end of the cut. The bow is shown below:

The problem here is that this seam is now exposed and is a weak area that will get abuse from grounding. This area was reinforced with a piece of the Dacron fabric with a simple hemmed edge on both sides, yielding a 3/4" wide tape. Starting on the deck about 3" behind the bow, this tape was whip-stitched to the fabric all around the edge. When the bow was reached, a 4" long loop was incorporated and then the strip was stitched to about 4" past the end of the seam below. The end result looks like this:
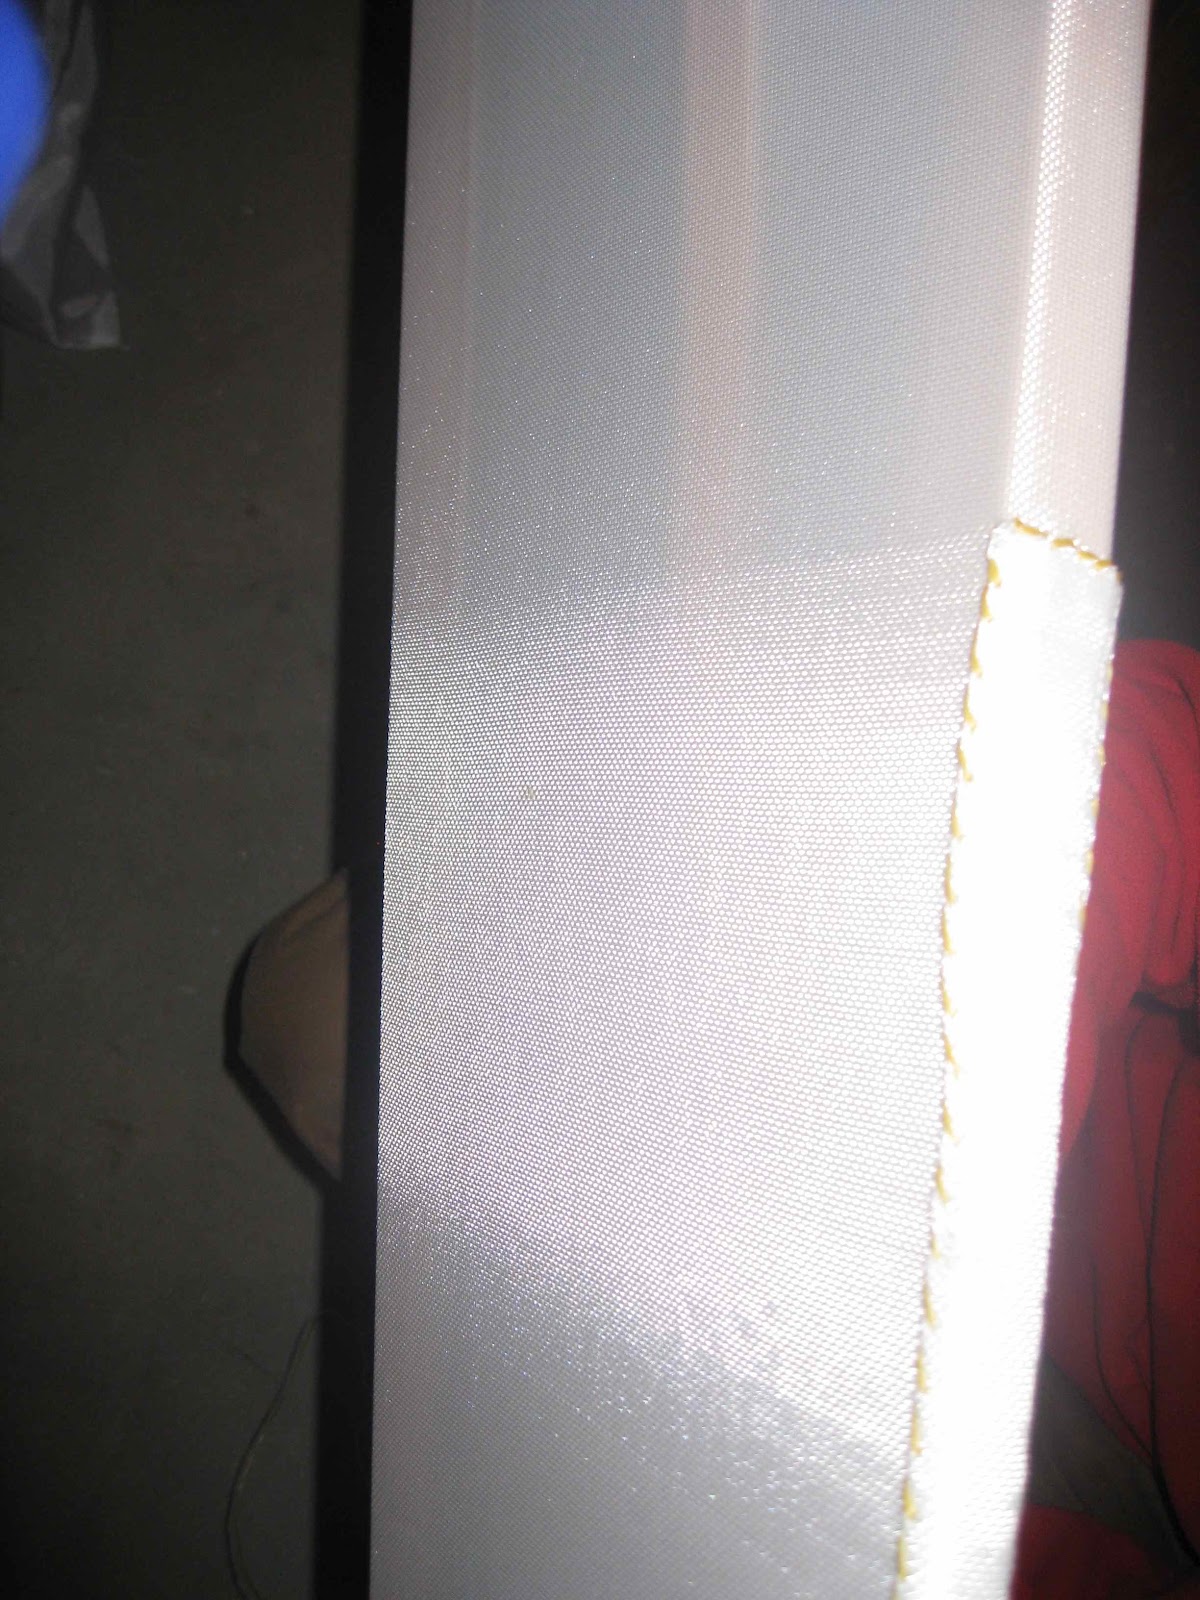
Contrast is a bit difficult, but you can just make out the seam around the edge.
Putting in the hatch and coaming rims is the hardest part of the process. You carefully put the frame in place centering and aligning it on the boat. It is then clamped in place with ratcheting strap (like for your roof-rack) around the hull, pulling it downwards to the frame. You cut the nylon lines in the middle of the opening. You then pull the fabric up along the inside edge of the rim, clamping the fabric to the rim as you go. At this point, ti may be necessary to cut the fabric to allow you to pull it up at the edges. To do this, cut radially from the center outwards in several places making sure not to cut closer than 1-1/2" to the rim. It helps to work symmetrically from side to side cutting and clamping to avoid causing the rim to move. Once you're happy with the result (minimal tension and wrinkles) you use the artificial sinew and a straight needle to sew the fabric to the rim with a running stitch through the holes. I then cut the edge of the fabric leaving an inch or so above the basted line and sealed the edge. The ends of the nylon line are also trimmed right where the deck seam ends. It looks like this:

Taking a small section of the nylon line, the extra flap of fabric is folded over the top of the line and basted in place like with the deck fabric. It now looks like this:

Now, I go around the cockpit rim at least twice. Stitching around the rope supported edge of the fabric as I go using a straight needle, pulling the edge up as I go. Sometimes you need to use the needle as a lever to pull the edge up. The final result is this:

Once this is completed for both the cockpit rim and the hatch rim - that is if you're installing a hatch - it's time to shrink the fabric. For this step a household steam iron and a meat thermometer were used. The thermometer was to tell the temperature of the iron's sole. The iron was filled with water and turned to a setting that yielded a sole temperature of 250°F. Running the iron over the fabric and dispensing steam, the wrinkles were taken out of the fabric. Once most of the wrinkles were gone (there were a few stubborn ones at the coaming edge...) the iron was re-set to a sole temperature of 350°F to shrink the fabric. Starting with the bottom, we ran the dry iron over the fabric. I kept hitting the fabric to listen to changes in the tension. I didn't want to over-tighten the fabric and cause holes to open in the stitching. I just wanted the fabric to be tight on the frame.
At this point, the fabric will be sealed with oil-based polyurethane and deck fittings installed. It won't be long before they are ready to paddle.
I should point out here that the skinning process was not instantaneous. It took two people several two and three hour evenings of work to complete. Just be patient and keep at it!
Friday, November 11, 2011
Progress from the Thotful Spot

One of the things that I was thinking about was how to finish the decks and inwales where they meet the stem ends at bow and stern. There are, frankly, many ways to solve this. However, I'm trying to make this relatively simple and elegant in appearance. I went back and did a bit of research and reading and have decided to use a solution that Jerry Stelmok taught in his class. On cedar and canvas canoes, the inwales are in place, but not attached at the stems. After the canoe is removed from the mold, the decks are installed. The joint where they meet is a mortise and tenon joint. In the image above, the inwales aren't seen to let you see the joint. A notch is made in the underside of the deck (the mortise) and a protrusion (the tenon) is left at the top of the stem. As the inwales are fitted to the deck, they close in the sides of the mortise. In this case, the tenon will be bonded with thickened epoxy.
Simple.
The inwales and outwales will be tapered at the ends to give a more delicate appearance. After the hull has been skinned, the stem ends will be protected with a piece of brass stem-band that will wrap over the top of the deck. The final screw holding the stem-band in place will be located through the deck and into the tenon.
More to come.
Friday, November 4, 2011
A bit more progress...

I've made a bit more progress on the frame for the skin-on-frame canoe this evening. I've got the forms mounted on the strongback and started to cut stringers. I think I've discovered my second "boo-boo". The chine stringers were intended to be fairly husky and while they bend well in one axis, they don't bend so well in the other. I think I'll need to lighten up on this excessively beefy piece of stock. I am liking the way the forms sit on the strongback for alignment. It's a great deal more simple than trying to juggle frames in mid-air the way some kayak builders do.
More to come.
Friday, October 21, 2011
Well, we'll see...

I always tend to describe myself as being like a 40 watt bulb - I'm not necessarily the brightest, but I won't burn out prematurely like one of those fancy extra-bright halogen ones... So, being the Bear of Little Brain, I have been in my Thotful Spot again.
While I love teaching my cedar-strip canoe building class, there are some concerns. Chief among them is the cost and duration of the class - it is about $600-700 for materials and takes at least four, 14 week class sessions (time and $$$ both being a factor here...) for most students to complete a boat. This makes the class too expensive, and quite a commitment in terms of time. Also, it requires a bit of woodworking experience up-front or more build time to learn those woodworking skills. It's not that they are particularly difficult to learn, it's just that the skills need to be acquired - and that takes more time.
I'm looking to do something different.
I have several goals. I want to be building boats that will be...
- small and lightweight
- inexpensive
- quick to build
- less demanding of builder's skills
To that end, I've been working on some Thomas Yost style skin-on-frame kayaks to gain more experience with this sort of building style. Another person who has taken this idea and run with it is Dave Gentry. He's got a variety of nicely done skin-on-frame canoes and kayaks and has done both reproductions of classic craft as well as some of his own designs. I could definitely see doing some of his designs in a class like this.
After building the Yost-style kayaks, I've learned some things that I don't like about Yost's building method. It's difficult to get the patterns square and perpendicular. I did, however come up with a solution to this issue and would be comfortable to be building a boat like this in class. Still, I'm a canoe guy - I like kayaks, but prefer to paddle canoes. So, I've been working to develop a design of my own.
The image below shows the germ of the idea. It is still missing some critical features, but the majority of it is there. These are plywood stations for a non-traditional solo skin-on-frame canoe.

They can easily be copied by a relatively inexperienced woodworker from master patterns using a router and a pattern bit. It's a 13' long asymmetrical solo double-paddle canoe. It's about 28" wide, has slight rocker, a little tumble-home to the sides and a shallow arch for a bottom. The thing that I feel makes my design a bit different is that I'm using the stations themselves as the fixturing to assure that they are square and perpendicular to the main axis of the canoe. After the stringers have been installed, the 'frame' part of the stations will be cut free from the 'fixturing' part of the stations to release the boat for finishing and skinning. I'm even toying with the idea of integrating grab handles into the last two stations for carrying the boat (by two people...). I'm concerned that even with the light weight of the canoe, a bit more or wider material would be desirable for comfort.
I have some more design work to validate the shape's stability and am working on a 1/2 scale model to figure out the construction details. I think this is going to be interesting!
Subscribe to:
Posts (Atom)


 Posts
Posts


