Shortcuts?
Um, no.
Mistakes?
Fix them.
Last weekend at class, I felt a little bit like I was being torn in several directions. Because of the fact that I have two different boat designs being built in the same class and that due to absences, not all of the students are at the same point in the build, I found myself giving small snippets of instruction on an "as-needed" basis. I usually like to keep the group together and to tell them about both the current step and what impact that step may have on future steps. I don't like to only talk about the current step as it can be an opportunity for mistakes in future.
Some of the snippets included instructions to two students about how to cut the stems to mate with the inwales. Another was to help one student cut stock for thwarts, rub rails and scupper blocks and to help set up the fixture we're using to cut nice curves into the ends of the scupper blocks. In between this, I directed one student to my tool bag to find some artificial sinew.
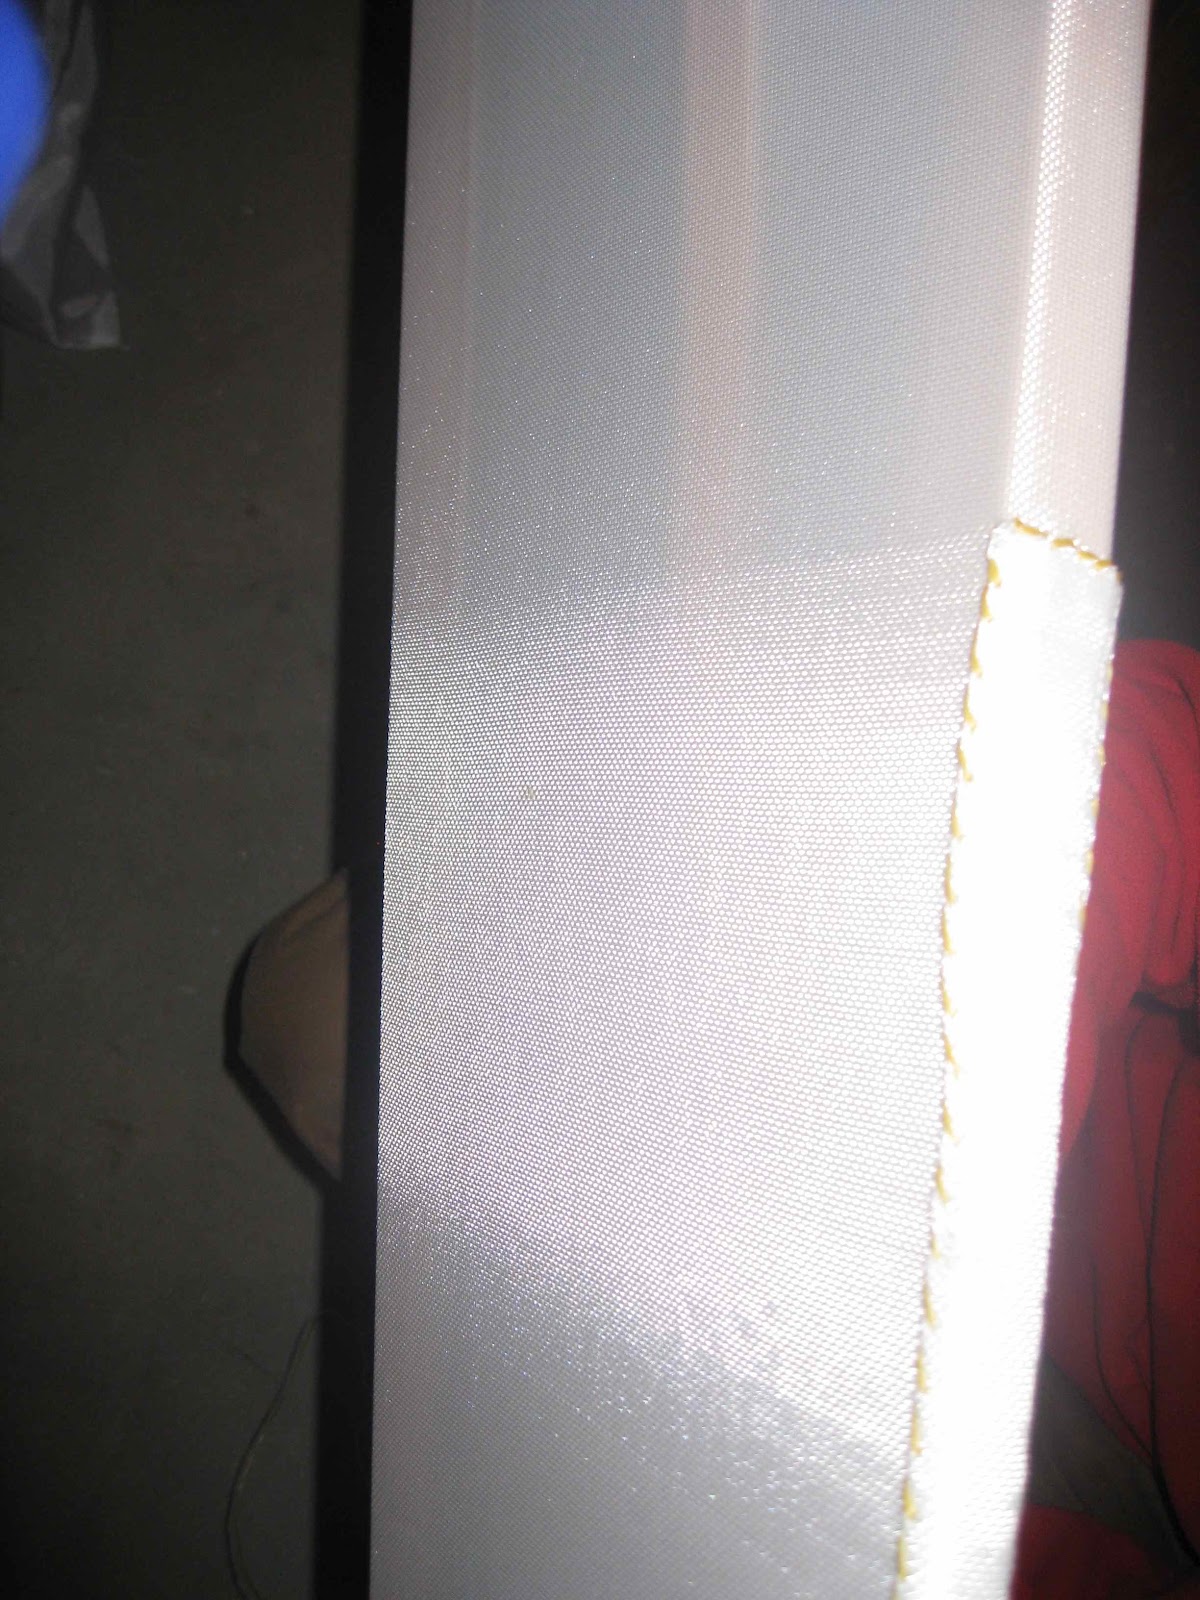
This student had begun lashing the floors to his frames last weekend, but hadn't completed the task. He needed to finish and had to have the sinew to do this. What I'd forgotten was the fact that I had two different colors of sinew in my bag:
The color on the right is the one that he'd lashed the floors in with last weekend. He'd gotten one and a half floor slats lashed in with the sinew on the right. It stuck out like a sore thumb. As this student didn't find the lashing to be an easy task, when I suggested that he should cut out the odd-colored lashings, he didn't want to remove them. He considered it a small issue.
I insisted.
I decided to use this as a teaching opportunity to show another student how to lash the floors to the frame. With the three of us lashing the floors in place, we not only replaced the odd-colored lashings, but we completed the whole floor in no time at all.
People often wonder why I push them to fix what they consider small issues. The reason is simple - they're things that I think people will notice and that the builder will regret at a later date.
I'll repeat - there really aren't any shortcuts and if you can fix a mistake, do it!
Showing posts with label Devil in the details. Show all posts
Tuesday, March 19, 2013
Tuesday, February 5, 2013
Tech Tip Tuesday
Class has been ticking along with the students getting their frames near completion. The canoe plans came from S. Jeff Horton's book on skin-on-frame building that's available on Amazon - he's even got a second book available.
Before you take issue with what I write here and think that I'm throwing Jeff "under the bus" as it were, I'm not. I think he does some interesting things and offers some good designs, but I think he lacks some experience with other canoe building traditions. Even he states that he's not really a "canoe guy" and I think that hampers him in designing a skin-on-frame canoe. I do think that for our application, we've made some improvements to the design in terms of functionality and aesthetics.
He's got what looks to be a great shape for the canoe, but I take issue with a few of his construction details. First, in his design, he notches the bottom of the frames where a plank boat would have garboards to put in floors. First, the notching weakens the frames significantly. While Jeff shows a slightly raised seat in his design, we really want the paddler to sit as low as possible in the canoe. This would have the paddler's butt in any water that might be on the floor if they were sitting that low. Last but not least, the fabric rides right on the floors, which doesn't allow the fabric to flex over obstacles that you might encounter in the water, resulting in potential damage to the skin.
To avoid these issues, we didn't notch the frames and will lash a floor to the top of the frames which I think will be a practical and more attractive solution. It should look very much like "duckboards" used to in a traditional canoe.
The other thing that I've been thinking about for quite some time is how to make the gunwales more traditional in their appearance. When building a wood and canvas canoe, the ends of the inwale and outwale often have a graceful taper to them and the stem is mortised to allow the gunwale to pass by and give a nice triangular area for the deck to sit within.
On Jeff's canoe, he has the deck as a "cap deck" which lets him hide the fact that the inwales aren't well fitted. He claims that this type of woodwork is beyond most, but I think that's a little simplistic. To be honest, I've been thinking about this for a while and last weekend, we made a test cut on the first boat.
We started by placing the inwale in place and clamping it to the end of the stem. We made a horizontal mark at the bottom of the inwale. We also marked the centerline of the stem face. Using a bevel gage, we took the angle that the inwale met the stem and marked from the centerline to outside faces. A vertical line completes the marking.
Using a handsaw, we roughed away the material and finished with a chisel. Here is the result:
The next step was to take the inwale and taper it from a 1/8" thickness at the end of the stem to full thickness at the first form. We repeated this for the outwale and made a tapered spacer that went between the inwale and outwale. The length of the spacer was such that the thickness of the outwale was 7/16" where the spacer ended. There is an important reason for this - we'll be using 3/8" long staples to attach the fabric to the outwales and don't want the staples poking though into the scupper openings.
I think that the tapered ends look very nice. We still have a bit to go on this idea yet - Jeff's scupper blocks were irregularly spaced, so we're going to deal with that. To do that we'll cut down the frames by about half an inch or so in order to hide them with pieces of the Western Red Cedar used for the gunwales allowing us to make more uniformly spaced scuppers. Also, the stem ends will be cut down and the breasthooks tips will be notched underneath to allow only the deck to be seen, not the end of the stem frame.
More to come!
Tuesday, May 1, 2012
Tech Tip Tuesday
To quote Steven Stills, "Well there's things I am and there are things I'm not..." I don't think of myself as generally being good with a needle and thread. Boat tailor? I guess that's now a "thing that I am". Let me just say, there is a lot of needle and thread work in the boat on the right.
First, I have to say, the process of skinning the kayak was not difficult once we had things all figured out. It is time consuming and what information that I found was somewhat poorly illustrated or explained. I think it has a lot to do with the fact that it's something that you really need to see.
In our case, the process started out with the frame. For finish on the frame, we opted for a polyurethane finish as opposed to an oiled finish as some people choose to do. We then applied wax to the frame (I refer you to my previous bout with Murphy...) and polished it. The reason for waxing the frame is so the fabric not to stick to the frame when coated after skinning. At any rate, we started with the frame upside down:
We then used a piece of 8 oz Dacron cloth to cover the boat. The Dacron was selected over Nylon because it will shrink a bit when heated which lets you get wrinkles out at the end of the process - more about that later. We simply folded it in half length-wise and laid it over the hull to center it. We then used some thumbtacks to keep things in position. We then pulled down a bit and tacked at the sheer clamp on both sides - on the bottom in the image below. We then basted the cloth together at both the stem and stern to make a small, temporary pocket at either end while the cloth was being pulled tight from stem to stern. (FYI : This cloth is available from George Dyson at Dyson, Baidarka & Company in Bellingham, Washington. Mr. Dyson does most of his business by phone and is easily found with a web search. He does have a Facebook page with contact info, but not a web site. )
We then rolled the boat right side up. For the next step, there are no pictures because our hands were full. I can probably explain it better, anyway. We took a long thin strip of wood - 1-1/4" wide and 1/8" thick and as long as the boat. This was temporarily lashed to the top of the frame and carefully centered. We then pulled the fabric from one half of the boat over the strip and cut the fabric along the far edge of the strip from one end of the boat to the other. This meant that I wound up with a piece of fabric that was half the width of the boat plus 3/4 of an inch. We then used a small butane torch to melt the edge of the fabric so that it would not fray. We then repeated the process for the other side of the boat. Note that whenever you cut the fabric you should always seal the edges.
At this point, I was concerned that the amount that we would not get the fabric tight enough. I was also concerned about avoiding excessive pulls in the weave as it is a fairly loose weave. We'd seen some pulling around the thumb tacks if we tried to stretch the fabric too hard or un-evenly from side to side. To avoid pulling too many large holes, we opted for a method that many others have used. They sew a piece of nylon line into the edges so they can pull on the nylon line, not the fabric. This distributes the tension and gives a neat, finished appearance to the deck seam.
To do this, we cut two pieces of braided 1/8" nylon line that were just longer than the boat. Using small brads, we tacked them at the very tip of the bow, centered, but about 3/8" apart. Pulling tightly, we then tacked them - again, centered, but 3/8" apart at the stern. I then used hemostats (locking clamps picked up at a local "bargain store") to spread the lines at the front and rear of the cockpit opening to about 5/8" wide. This resulted in the line spacing being "tapered" from center to ends. The logic here is that we will fold the cloth over the top of the line so that we wind up with a deliberate gap. As we stitch the two halves together, the cloth is pulled tight, closing the gap at the same time.
The cloth is wrapped over the line and basted with a running stitch using a straight needle. Because we didn't want the stitches to show, we used white Dacron thread. The stitches are about 1/4" long and very tight to the line. This was done on both sides from the edge of the cockpit opening to the bow and from the cockpit opening to the stern. Note the gap between the two sides here.
To stitch the deck together I opted to get waxed artificial sinew. It's available from leather working and craft shops. It is a synthetic thread with high strength and is available in a variety of colors. I bought "natural" which is a yellowy-tan.
The deck stitching is accomplished with curved needles. I think it would be either nearly impossible, or simply very difficult with straight ones. Be sure to get needles with a large eye as the waxed sinew is challenging to thread through the needle.
Starting about 1/2" back from the bow, I took a single length of the sinew with a needle at each end and came up from the bottom of the fabric just passing through the outside edge of the nylon line. on both sides. This hid the start under the fabric. You then start stitching diagonally across the gap, staying just on the outside of the nylon line (so the needle touches it!) You repeat with the other needle and you get a crossed pattern like this:
The stitches are about 3/8" long. You can see at the top of the picture how it pulls the fabric together. You can also just make out the turned under edge of the cloth on both sides of the seam. This cross stitching stops about 1/4" inside the cockpit rim (when put in place) You pull the gap up tight as you're stitching. The final stitches should go through the nylon line to hold things in place. This prevents the fabric from sliding along the nylon line. This process was repeated from the stern to the back of the hatch rim.
Ahh... The hatch rim and coaming. We drilled a series of small holes - big enough to pass the needle and thread - about 1" apart all the way around both the hatch rim and the coaming 3/8" up from the bottom. We located the rim and the coaming at the edges of the cross hatch and noted that there would be a small - maybe 4" section of center seam between the coaming and the hatch. We stitched it so it just came 3/8" into both the hatch opening and the coaming opening, stitching through the nylon line at either end. To re-cap here, we've got three sections of the deck seam completed so they end 3/8" inside the frames for the hatch and coaming.
We then cut the fabric at the stem and stern leaving 1/2" extra fabric. The brads holding the nylong line and the basting stitches were removed and the edges were tucked inside the hull along the sides of the stem and stern being careful to keep a straight edge along the stem forms about 3/8" apart. Starting where the cross-stitching ended at the tip of the deck, I cross-stitched the folded edges of the fabric together until I reached the end of the cut. The bow is shown below:
The problem here is that this seam is now exposed and is a weak area that will get abuse from grounding. This area was reinforced with a piece of the Dacron fabric with a simple hemmed edge on both sides, yielding a 3/4" wide tape. Starting on the deck about 3" behind the bow, this tape was whip-stitched to the fabric all around the edge. When the bow was reached, a 4" long loop was incorporated and then the strip was stitched to about 4" past the end of the seam below. The end result looks like this:
Contrast is a bit difficult, but you can just make out the seam around the edge.
Putting in the hatch and coaming rims is the hardest part of the process. You carefully put the frame in place centering and aligning it on the boat. It is then clamped in place with ratcheting strap (like for your roof-rack) around the hull, pulling it downwards to the frame. You cut the nylon lines in the middle of the opening. You then pull the fabric up along the inside edge of the rim, clamping the fabric to the rim as you go. At this point, ti may be necessary to cut the fabric to allow you to pull it up at the edges. To do this, cut radially from the center outwards in several places making sure not to cut closer than 1-1/2" to the rim. It helps to work symmetrically from side to side cutting and clamping to avoid causing the rim to move. Once you're happy with the result (minimal tension and wrinkles) you use the artificial sinew and a straight needle to sew the fabric to the rim with a running stitch through the holes. I then cut the edge of the fabric leaving an inch or so above the basted line and sealed the edge. The ends of the nylon line are also trimmed right where the deck seam ends. It looks like this:
Taking a small section of the nylon line, the extra flap of fabric is folded over the top of the line and basted in place like with the deck fabric. It now looks like this:
Now, I go around the cockpit rim at least twice. Stitching around the rope supported edge of the fabric as I go using a straight needle, pulling the edge up as I go. Sometimes you need to use the needle as a lever to pull the edge up. The final result is this:
Once this is completed for both the cockpit rim and the hatch rim - that is if you're installing a hatch - it's time to shrink the fabric. For this step a household steam iron and a meat thermometer were used. The thermometer was to tell the temperature of the iron's sole. The iron was filled with water and turned to a setting that yielded a sole temperature of 250°F. Running the iron over the fabric and dispensing steam, the wrinkles were taken out of the fabric. Once most of the wrinkles were gone (there were a few stubborn ones at the coaming edge...) the iron was re-set to a sole temperature of 350°F to shrink the fabric. Starting with the bottom, we ran the dry iron over the fabric. I kept hitting the fabric to listen to changes in the tension. I didn't want to over-tighten the fabric and cause holes to open in the stitching. I just wanted the fabric to be tight on the frame.
At this point, the fabric will be sealed with oil-based polyurethane and deck fittings installed. It won't be long before they are ready to paddle.
I should point out here that the skinning process was not instantaneous. It took two people several two and three hour evenings of work to complete. Just be patient and keep at it!
Labels:
Baidarka,
Devil in the details,
kayak,
skin-on-frame
Tuesday, December 14, 2010
Tech Tip Tuesday
The old adage that good workmanship is it's own reward is very true. It takes time and patience to build a nice boat and as you're doing all of your preparation work, it may seem that you will never finish.
First, the students built the strongback and set up the forms. They then ripped strips and made stems.
A post from last fall shows the preparation and good workmanship that went into the building of the building of the feature strip on their canoe.
They stripped the hull and fitted the outer stems.
These students shaped stems, applied filler, faired the hull and long-boarding the hull.
This past Saturday, they finally applied the sealer coat of epoxy. The contrasting feature strip "popped" against the hull and proved that the work was worth it.
Here are the proud builders posing with their beautiful boat in a fresh coat of epoxy sealer:

Isn't that Walnut and Basswood feature strip a stunner?
First, the students built the strongback and set up the forms. They then ripped strips and made stems.
A post from last fall shows the preparation and good workmanship that went into the building of the building of the feature strip on their canoe.
They stripped the hull and fitted the outer stems.
These students shaped stems, applied filler, faired the hull and long-boarding the hull.
This past Saturday, they finally applied the sealer coat of epoxy. The contrasting feature strip "popped" against the hull and proved that the work was worth it.
Here are the proud builders posing with their beautiful boat in a fresh coat of epoxy sealer:

Isn't that Walnut and Basswood feature strip a stunner?
Monday, December 6, 2010
Tech Tip Tuesday
I would guess that this is one of my more overdue posts.
It is about the steps between the finishing process and the 'glassing process. After the canoe is stripped, outer stems (if you have them...) are installed and shaped, and any fasteners used to hold strips in place have been removed (if you didn't go staple-less..) you need to fair the hull. At this point, the hull has facets made up of the individual strips.
You want a nice, smooth, fair hull - by fair, I mean "canoe shaped" without dips or lumps. Fairing is accomplished with planes, spokeshaves and longboards. I've talked about fairing and longboarding before so I will not go into detail here.
After you've faired, take a cloth with warm water and dampen the hull slightly - this will make any residual glue spots show up more clearly. Circle these areas with a pencil (lightly - so as not to make dents!) so when they dry you will know where to sand to remove the glue. It will show up as light spots when you fiberglass the hull.
In the process of building a cedar strip canoe, most beginning builders will have some small areas where there are gaps, checks or holes in your boat. First, I should explain that they're not a problem for how waterproof the canoe will be - they're mostly cosmetic, but can cause some problems during the fiber-glassing process. The major problems are bubbles caused by air escaping from the gaps and epoxy running between the hull and the forms - either bonding the hull to the forms or the forms to the strongback. This can also lead to "starved" spots in the fiberglass cloth.
To deal with any of these areas, we make what Nick Shade of Guillemot Kayaks refers to as "Dookie Shmutz". This is a mixture of epoxy that has wood flour added to it to color the epoxy and some fumed silica to make a non-sagging mixture. Wood flour is simply what it sounds like - fine wood dust - you can get a good color match by saving any sanding dust from the fairing process. By non-sagging, I mean that it doesn't run. The mixture should be about the consistency of peanut butter.
Some people have recommended mixing white glue with the wood flour to make a paste filler, using wood putty (i.e. "plastic wood"), auto body fillers or even some of the pre-thickened epoxies such as System Three's Quick Fair or Gel Magic. First, I can't recommend wood putty or auto-body fillers as they are brittle. I don't recommend using wood glue mixed with wood flour for two reasons - the epoxy doesn't bond to the glue and cosmetically it's not very good-looking on a bright-finished canoe. If you are not going to have a bright finished canoe, (i.e. a painted canoe) you could use the other epoxy-based fillers.
So, if you are going to have a nice looking bright finished boat, you'll mix yourself up some Dookie Shmutz. We usually use poly squeegees to apply the filler to the cracks. The best way to think of it like spackle for holes in the wall, but for your boat - you want it in the cracks, but not all over the wall. Dookie Shmutz that gets on the lighter colored wood will show if you don't remove it by sanding later. This material is very, very hard when cured, so you don't want to get too much excess on the hull. It's not out of line to use some masking tape around the gaps to help keep as much of the filler off the hull as you can.
This is what the bow of the Prospector Ranger looks like after some filler has been applied:


In the bottom picture, you can see that some of the material near the stem has been sanded away. In the next image, you can see some dark lines that are showing between the strips and all the excess has been removed from the wood.

While the filler looks dark now, once the hull is saturated with epoxy and 'glassed, it will darken. Over time, the cedar will mellow and darken, getting closer in color to the the filler. Still, you must keep in mind that both the Dookie Shmutz and any areas of the cedar that have been damaged by staples, nails or any other mechanical damage, will be slightly darker because the fibers have been damaged and simply are darker in color.
It is about the steps between the finishing process and the 'glassing process. After the canoe is stripped, outer stems (if you have them...) are installed and shaped, and any fasteners used to hold strips in place have been removed (if you didn't go staple-less..) you need to fair the hull. At this point, the hull has facets made up of the individual strips.
You want a nice, smooth, fair hull - by fair, I mean "canoe shaped" without dips or lumps. Fairing is accomplished with planes, spokeshaves and longboards. I've talked about fairing and longboarding before so I will not go into detail here.
After you've faired, take a cloth with warm water and dampen the hull slightly - this will make any residual glue spots show up more clearly. Circle these areas with a pencil (lightly - so as not to make dents!) so when they dry you will know where to sand to remove the glue. It will show up as light spots when you fiberglass the hull.
In the process of building a cedar strip canoe, most beginning builders will have some small areas where there are gaps, checks or holes in your boat. First, I should explain that they're not a problem for how waterproof the canoe will be - they're mostly cosmetic, but can cause some problems during the fiber-glassing process. The major problems are bubbles caused by air escaping from the gaps and epoxy running between the hull and the forms - either bonding the hull to the forms or the forms to the strongback. This can also lead to "starved" spots in the fiberglass cloth.
To deal with any of these areas, we make what Nick Shade of Guillemot Kayaks refers to as "Dookie Shmutz". This is a mixture of epoxy that has wood flour added to it to color the epoxy and some fumed silica to make a non-sagging mixture. Wood flour is simply what it sounds like - fine wood dust - you can get a good color match by saving any sanding dust from the fairing process. By non-sagging, I mean that it doesn't run. The mixture should be about the consistency of peanut butter.
Some people have recommended mixing white glue with the wood flour to make a paste filler, using wood putty (i.e. "plastic wood"), auto body fillers or even some of the pre-thickened epoxies such as System Three's Quick Fair or Gel Magic. First, I can't recommend wood putty or auto-body fillers as they are brittle. I don't recommend using wood glue mixed with wood flour for two reasons - the epoxy doesn't bond to the glue and cosmetically it's not very good-looking on a bright-finished canoe. If you are not going to have a bright finished canoe, (i.e. a painted canoe) you could use the other epoxy-based fillers.
So, if you are going to have a nice looking bright finished boat, you'll mix yourself up some Dookie Shmutz. We usually use poly squeegees to apply the filler to the cracks. The best way to think of it like spackle for holes in the wall, but for your boat - you want it in the cracks, but not all over the wall. Dookie Shmutz that gets on the lighter colored wood will show if you don't remove it by sanding later. This material is very, very hard when cured, so you don't want to get too much excess on the hull. It's not out of line to use some masking tape around the gaps to help keep as much of the filler off the hull as you can.
This is what the bow of the Prospector Ranger looks like after some filler has been applied:


In the bottom picture, you can see that some of the material near the stem has been sanded away. In the next image, you can see some dark lines that are showing between the strips and all the excess has been removed from the wood.

While the filler looks dark now, once the hull is saturated with epoxy and 'glassed, it will darken. Over time, the cedar will mellow and darken, getting closer in color to the the filler. Still, you must keep in mind that both the Dookie Shmutz and any areas of the cedar that have been damaged by staples, nails or any other mechanical damage, will be slightly darker because the fibers have been damaged and simply are darker in color.
Monday, November 15, 2010
Tech Tip Tuesday

Well, according to Robert Heinlein, TANSTAAFL.
TAANSTAAFL?
For the rest of us, that means, "There ain't no such thing as a free lunch."
Well almost. There is a wonderful place that is paid for by the US taxpayer. It is a division of the Forestry Service under the auspices of the Department of Agriculture called the Forest Products Laboratory. They say about themselves:
Our mission: To identify and conduct innovative wood and fiber utilization research that contributes to conservation and productivity of the forest resource, thereby sustaining forests, the economy, and quality of life.Which really doesn't do the variety of research that they do justice - or the services that they provide doing wood identification. One of the marvelous things they publish which almost any woodworker would find useful is their Wood Handbook. This document is available as a free download. However, this isn't to say that the information is limited to the engineering properties of wood - if you can think of anything to do with wood, they've probably done research on the subject. They provide an amazing amount of information and have been doing it now for one hundred years.
Well worth a look!
Monday, April 5, 2010
Maine Boatbuilders Show : Episode 5
While it is called the Maine Boatbuilders Show, boatbuilders and suppliers from all over come to the show. There are quite a few builders from Cape Cod, one from Northwestern Vermont, Southern Connecticut and Nova Scotia, Canada. There was a vendor of custom instrument panels who'd even come all the way from Washington State.
One of the vendors from Cape Cod was Ballentine's Boat Shop, They had one of their boats on display along with a nice display of custom brass work. I thought that their slide show was both unique and interesting - they were showing their work using the sail of the boat on display as the screen for the slides!


Steve Kaulback from Adirondack Guideboat, located in North Ferrisburgh, Vermont - not far from Burlington - had a variety of their beautiful guideboats on display. They included all-wood boats sheathed in fiberglass and the Kevlar and fiberglass hulls with wood trim. Steve's company sells a variety of designs and sizes as complete boats and as kits for the home builder.
Be sure to stop by and visit their website for some better views of their boats.


From Southern Connecticut was Nick Schade of Guillemot Kayaks had some of his beautiful and lightweight canoes and kayaks on display. Nick is an incredibly well-rounded guy. He's a mechanical engineer by training, a small boat designer and builder, an author and a teacher. At the WoodenBoat School this year, in addition to his usual classes, Nick will be picking up the Cedar Strip Canoe building class that had been taught by Ted Moores of Bear Mountain Boats. Nick has a new book out in the past year entitled, Building Strip-Planked Boats. This new book is a more general purpose book on the subject and includes information on the building of a dinghy, canoe and kayak.
Nick had four boats with him - two of his Nymph double-paddle canoes, his Aleutesque sea kayak and a stitch-and-glue Night Heron kit with puzzle cut panels. I'm always interested in getting an opportunity to talk with Nick as he's always got something new up his sleeve and usually has come across that obscure building detail that I haven't seen yet.


I should also mention that Nick's brother Eric is a talented designer and builder in his own right. Eric owns Shearwater Boats and also teaches at the WoodenBoat School among others places. Eric's plans and kits are also available through his partnership with John Harris of Chesapeake Light Craft.
From Chester Basin, Nova Scotia was Bruce Thomson of Tern Boatworks. Bruce had brought along Enigma - a stunning International One Design with a well-faired black hull. It shone like a mirror and the detail was fantastic.

Tern's platform for viewing Enigma was busy for quite some time. I came back three times before I had the opportunity to climb the platform to get a look at her and talk to Bruce. It was a good testament to their workmanship.
The aft deck was simple and clean...

The woodwork on the interior was to the same high standard as the rest of the boat...

Bruce said that this had been an interesting challenge as the plans that had arrived were in a foreign language. While this might not normally be a challenge, the terminology for boat building in different languages can be very specific. He discovered that they needed a little help to assure themselves that they'd gotten terminology correct.
A beautiful scarf joint at the rail with matched plugs. The Devil is still in the details...
One of the vendors from Cape Cod was Ballentine's Boat Shop, They had one of their boats on display along with a nice display of custom brass work. I thought that their slide show was both unique and interesting - they were showing their work using the sail of the boat on display as the screen for the slides!


Steve Kaulback from Adirondack Guideboat, located in North Ferrisburgh, Vermont - not far from Burlington - had a variety of their beautiful guideboats on display. They included all-wood boats sheathed in fiberglass and the Kevlar and fiberglass hulls with wood trim. Steve's company sells a variety of designs and sizes as complete boats and as kits for the home builder.
Be sure to stop by and visit their website for some better views of their boats.


From Southern Connecticut was Nick Schade of Guillemot Kayaks had some of his beautiful and lightweight canoes and kayaks on display. Nick is an incredibly well-rounded guy. He's a mechanical engineer by training, a small boat designer and builder, an author and a teacher. At the WoodenBoat School this year, in addition to his usual classes, Nick will be picking up the Cedar Strip Canoe building class that had been taught by Ted Moores of Bear Mountain Boats. Nick has a new book out in the past year entitled, Building Strip-Planked Boats. This new book is a more general purpose book on the subject and includes information on the building of a dinghy, canoe and kayak.
Nick had four boats with him - two of his Nymph double-paddle canoes, his Aleutesque sea kayak and a stitch-and-glue Night Heron kit with puzzle cut panels. I'm always interested in getting an opportunity to talk with Nick as he's always got something new up his sleeve and usually has come across that obscure building detail that I haven't seen yet.


I should also mention that Nick's brother Eric is a talented designer and builder in his own right. Eric owns Shearwater Boats and also teaches at the WoodenBoat School among others places. Eric's plans and kits are also available through his partnership with John Harris of Chesapeake Light Craft.
From Chester Basin, Nova Scotia was Bruce Thomson of Tern Boatworks. Bruce had brought along Enigma - a stunning International One Design with a well-faired black hull. It shone like a mirror and the detail was fantastic.

Tern's platform for viewing Enigma was busy for quite some time. I came back three times before I had the opportunity to climb the platform to get a look at her and talk to Bruce. It was a good testament to their workmanship.
The aft deck was simple and clean...

The woodwork on the interior was to the same high standard as the rest of the boat...

Bruce said that this had been an interesting challenge as the plans that had arrived were in a foreign language. While this might not normally be a challenge, the terminology for boat building in different languages can be very specific. He discovered that they needed a little help to assure themselves that they'd gotten terminology correct.
A beautiful scarf joint at the rail with matched plugs. The Devil is still in the details...
Tuesday, March 23, 2010
Maine Boatbuilder's Show : Episode 2
As you walk into the show, you are first struck by the cavernous size of the building you are in and the overhead gantry cranes. If I recall correctly, someone told me that the building had originally been for the building or repair of railroad engines. I'll have to check up on that one.
Usually, there are two or three LARGE powerboats in the center of this space - this year was no exception. Immediately in front of me was Zogo - a hybrid diesel/electric launch built by French & Webb. It was a pretty boat, with a unique color... (Photo by Derek Davis of the Portland Herald.)

To my right was the display from Artisan Boatworks. This was Murmur; a Buzzard's Bay 15 day sailor designed by Nat Herreshoff. For the past three years that I've been attending the show, Artisan always has a fantastic display that draws a huge crowd. While my photos can't begin to do justice to this boat, here they are:

Attention to detail seems to be the rule here - from the flowers to the hardware, woodwork and finish.

To give you a better idea of the beauty of the boats that Artisan builds, here's a shot showing the deck and interior from their promotional materials.
A picture of one of these boats from last year's show has been a consistent draw here from the web.
To my left was Dick Pulsifer's Pulsifer Hampton strip-built center console workboat. Definitely a utility boat, but a well made and well finished boat suited to its purpose:

I'll admit that when I go to the show, I tend to ignore most of the large powerboats. Some of the smaller ones I find interesting, including an electric inboard launch that Thad Danielson of of Redd's Pond Boatworks brought to the show three years ago. However, unless there is something particularly interesting about a large powerboat, I tend to skip over them as I don't have much personal interest in them. Apologies if that was what you were hoping to find. Still, I do find some interesting - like the Zogo for it's hybrid drive and others for their shallow water jet drives.
Cape Cod Shipbuilding had another beautiful Herreshoff 12 1/2 on display again this year. This popular daysailor always seems to be a popular draw. This year, the boat on display was available for a mere $42,260.00. I'll let you enjoy their handiwork:


More to follow...
Usually, there are two or three LARGE powerboats in the center of this space - this year was no exception. Immediately in front of me was Zogo - a hybrid diesel/electric launch built by French & Webb. It was a pretty boat, with a unique color... (Photo by Derek Davis of the Portland Herald.)

To my right was the display from Artisan Boatworks. This was Murmur; a Buzzard's Bay 15 day sailor designed by Nat Herreshoff. For the past three years that I've been attending the show, Artisan always has a fantastic display that draws a huge crowd. While my photos can't begin to do justice to this boat, here they are:

Attention to detail seems to be the rule here - from the flowers to the hardware, woodwork and finish.

To give you a better idea of the beauty of the boats that Artisan builds, here's a shot showing the deck and interior from their promotional materials.
A picture of one of these boats from last year's show has been a consistent draw here from the web.To my left was Dick Pulsifer's Pulsifer Hampton strip-built center console workboat. Definitely a utility boat, but a well made and well finished boat suited to its purpose:

I'll admit that when I go to the show, I tend to ignore most of the large powerboats. Some of the smaller ones I find interesting, including an electric inboard launch that Thad Danielson of of Redd's Pond Boatworks brought to the show three years ago. However, unless there is something particularly interesting about a large powerboat, I tend to skip over them as I don't have much personal interest in them. Apologies if that was what you were hoping to find. Still, I do find some interesting - like the Zogo for it's hybrid drive and others for their shallow water jet drives.
Cape Cod Shipbuilding had another beautiful Herreshoff 12 1/2 on display again this year. This popular daysailor always seems to be a popular draw. This year, the boat on display was available for a mere $42,260.00. I'll let you enjoy their handiwork:


More to follow...
Tuesday, March 16, 2010
Tech Tip Tuesday

If you look at some of my posts, one of the common labels that you will see is "Devil is in the details..." I think that the best canoes are those where the builder has thought ahead to how they want the canoe to look when it is finished. Often, the new builder is so wrapped up in what they are doing at the moment, that they're not thinking ahead to the finishing details.
The choices are only limited by your imagination. The variety is really mind-boggling if you think about it too much. There are lots of good examples of how to finish your canoe's details by looking at both classic and modern canoes - it's a matter of taste, really. Pictures can be found by searching online for images using "canoe bow" and "canoe deck".
After the hull is finished and 'glassed, the trim needs to go on. For our small solo canoes, this typically includes the seat, a thwart, decks and gunwales. For those that like the woodwork a bit fancier or are concerned about shipping water over the deck (a serious concern in small canoes with low freeboard) a coaming - a curved lip at the back of the deck to help deflect water away from the inside of the boat is a good idea.

Another good thing to add to the canoe is a footrest. This helps as you paddle the canoe to give something to push against. Often, this is just a stick parallel to the front edge of the seat and tied to the front edge of the seat.
The other concern that people have a hard time figuring out is how to tie a rope to the bow and stern of the canoe. This is important for several reasons. First, you need to be able to tie your boat down to the top of your car to transport it. You also will want to tie the boat up so it doesn't float away from a dock or beach. You may also want to be able to "line" the boat through shallow water where the bottom is too muddy to walk along beside your canoe. This needs to be secure as the forces on your canoe - particularly on the car - can be high as it is going down the highway. You definitely don't want your hand-made boat to go flying off. (See my previous post on transporting boats here.)
There are lots of ways to attach a line to the front of the canoe. You can put in a ferrule like the one below:

It is a hole drilled through the bow of the boat that is lined with a piece of brass or bronze tubing that has rounded edges to keep from chafing the line. It is simple and effective, but you need to do a good job sealing to avoid having a place for water to get in and to rot the wood of the canoe.
A simple way to attach a line and to have a good place to carry the canoe is to add a grab handle at the bow and stern - it just needs to be comfortably rounded - like the one below:

Brass or Stainless quarter round stock can also be purchased and formed around the stem and stern of the canoe. As with the hole through the bow, this needs to be well sealed as you will be screwing into the wood of the stem. The benefit is that it helps to protect the bow from abrasion. Often, as seen below, this metal strip is bent over the top of the deck. Sometimes, a loop is formed at the apex for a painter ring to tie on a rope.

Older boat designs like the B.N. Morris below had custom hardware like the diamond painter ring mounts and the flag socket.

Hardware was often vendor specific, as can be seen from the Old Town painter rings below:

Personally, I don't like the painter rings as they bang around on the boat damaging the deck unless there is something to protect the deck. To avoid the loose rings, a solid pad eye can be screwed down to the deck. Along with another version with a loose painter ring, here are 5 different versions:

There IS a reason that stuff like this is known as "canoe jewelry". Pretty, isn't it?
It is also possible to mount hidden hardware beneath the deck - such a a brass, bronze or wooden cleat below the deck. Most people are familiar with a "horn cleat" which looks like this:

Don't let this limit you, however - there are many other types of cleats, such as the very art-deco streamlined cleats here:

Canoe hardware is smaller than that found on most other boats and can be a bit hard to find at an appropriate scale. Be sure to keep that in mind as you look.
Where do you look? Well, that's up to you.
You can make your own wooden hardware from unusual hardwoods - ebony, hard maple, etc. If you've made the boat, how hard can the hardware be?
You can also cast your own brass or bronze hardware. Really. I'm serious. There are classes out there where you can learn to make patterns and actually cast your own parts. If you want something specific, it isn't a bad way to go. Alternatively, you can cut, file and polish parts out of brass - it's fairly soft metal and machines easily. You can also contract the manufacture of custom hardware. One source is the Springfield Fan Centerboard Company which is known for reproduction canoe hardware - including articulated fan centerboards similar to the Radix boards used in sailing canoes of the late 1800's.
You can buy old or antique hardware from dealers, too. One source is a company called Ross Brothers who are active WCHA members. The WCHA also has a list of vendors for canoe building vendors and material suppliers on their website.
New hardware is also available from a variety of vendors. Among them are Hamilton Marine, West Marine, Jamestown Distributors, Bristol Bronze and TenderCraft Boat Shop.
Just remember, you're only limited by your imagination!
Subscribe to:
Posts (Atom)