 Two nights ago, I cut out the "floors" for the kayak. Bascially, I took the existing pattern, traced the bottom of it and offset the inside surface by the thickness of the slats which will be the actual seating and storage surface. They extend to just inside of the chine stringers. Fairly straightforward. I opted not to use a metal bracket the way Thomas Yost does - trying to keep things from looking "industrial". Basically, I'm looking for something I think is more aesthetically appealing and easier for students to make.
Last night, I sanded the "floors" and bonded them to the frames that make up the skeleton of the boat with thickened epoxy. The hardest part was spreading an even film of epoxy. I also removed the screws that were used during the assembly process. The holes were drilled up to a larger diameter (Ø 7/32") and Ø 3/16" dowels were bonded into the holes with polyurethane adhesive. These are put in to resist shear between the stringers and the frames.


I've also begun thinking about the coaming and hatch cover and am not planning on using Yost's method of plywood framing in this area. There is a definite reason for this deviation. With Yost's method, there is a frame beneath the skin. When the kayak is inverted to get water out of the boat, some of the water will be trapped by dam created by the plywood. In traditional skin-on-frame kayaks, the coaming is actually stitched to the skin and floats, for lack of a better term.
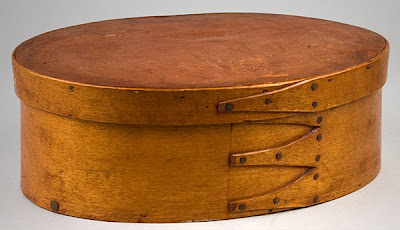
I'm still debating how I am going to accomplish what I want to with the coaming and hatch cover. My mental picture of what I want is a laminated rim like a Shaker oval box. The problem is that there were support blocks and the plywood rim which make an incredibly strong cockpit coaming in Yost's design.


No comments:
Post a Comment