If you're going to take the time to build your own boat, you should always use the best material that is available to you. You're going to spend many, many hours working on the boat and you want to have something you can be proud of. I figure that if you're building a canoe for the first time, you'll probably spend a great deal of your time looking for suitable materials for your boat. Don't skimp on the time you spend looking for good materials.
It only makes your life difficult to use the wrong parts or poor quality stock. I had one student show up at class with some Mahogany for trim and seat frames. He was trying to save money and use stock he already had. The wood was badly weathered and checked stock that had holes though it where fasteners had once been installed. I tried to convince him that it wasn't exactly what he wanted for his trim. I was concerned that it wouldn't clean up well and was not going to be strong enough. The only way that I could finally get my point across was to actually mill up some of the stock. At this point, seeing the milled stock the student was convinced things would be just fine. (Uh oh...) I then set up the two pieces of wood that were milled to be stretchers for the seat frame like they would be in the finished canoe. I had him sit on the stretchers with the expected result. CRACK! Thankfully, he only dropped the 3" to the bench.
Good material tends to yield good results. Enjoy the beautiful pictures!
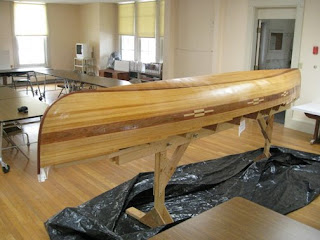
Raw hull stock (clear vertical grain Western Red Cedar):
The trim (Teak):
Hardware (Brass, Bronze or Stainless) :
Rigging (quality bronze, clear, straight grained stock and hand spliced line):
Finish and coatings (No bugs around for THAT varnish job...) :
Necessary equipment :
Tuesday, March 31, 2009
Monday, March 30, 2009
Banking
I was looking at my on-line banking at lunch time today and was a bit confused at a transaction that I saw on the account. It said that there had been a withdrawl transfer to account number XXXXXXX. I didn't recognize account number XXXXXXX and didn't remember making any transaction in the amount listed. I did have a suspicion of what it might be, but decided to be on the safe side and contact the bank's customer service department.
A woman by the name of "Kim" answered the phone in customer service. I gave her the account information and we went through the usual security check so that she could make sure that I am who I am (whomever that may be...) When these formalities were finished, the conversation went something like this:
Kim : Ok, sir, how can I help you today?
Me : Well, I was looking at my account and there was a transaction that I didn't recognize. It's probably the annual payment for our safe deposit box. I just wanted to be sure that nobody was surreptitiously and maliciously draining my account.
Kim (without missing a beat) : No problem, sir, it's just the bank surreptitiously and maliciously taking money out for the safe deposit box rental.
That pretty much made my day. All I can say is, that she deserves a raise.
Sunday, March 29, 2009
A great little video
From Francois Rothian - an overview of a birch-bark canoe build from start to finish. In it are a few segments showing Francois using a crooked knife in the build of the boat. In function, it's sort of a cross between a spokeshave and a drawknife.
I think you may have noticed by now that this is not one of the types of canoes that I have on my build list. The primary reason is that I don't have access to the materials required to build a birch bark canoe. One of the things to always remember in building your canoe - whatever kind - is that you should always use the best materials available. To quote a computer progamming acronym GIGO (Garbage In Garbage Out) Someday, if I get the opportunity to work with an expert builder of this method, I might give it a try, but I seriously doubt that I'll get that opportunity.
Saturday, March 28, 2009
Alas poor Lucky...
I posted here earlier about our local rabbits. The little guy in the picture was dubbed "Lucky" by the kids as we continued to see him around the yard at various times. We didn't see any of the siblings that were in the nest with him, so we figured he was "lucky".
Today, I was cleaning up the yard and DW and I were looking at things we wanted to do for some landscaping. While we were looking around, she pointed out a rather large quantity of rabbit droppings with some level of disgust. Later, as I was working in the backyard, there was an area with tufts of fur. It was very fine, soft fur with a grey inner layer and brown and white tips on it.
Rabbit colored.
Uh oh.
I figured that one of the rabbits must have been a snack for our local bobcat, a fox or perhaps a hawk. There was quite a bit of fur, but I found no evidence of blood, bone or anything else.
I quietly pointed out this somewhat disturbing find out to my DW by letting her know that we would have fewer rabbit droppings in the yard. She promptly went to take pictures for her blog. (She hasn't posted anything yet. I'll add a link here when she does.) DS and DD wanted to know what DW was doing laying outside on the lawn with a camera and went outside to see what she was doing. DS came in without comment, but DD seemed upset that something had gotten one of the "cute bunnies" and she hoped that it wasn't Lucky. With no small amount of sarcasm, DW pointed out to DD that whichever one of the rabbits it was, it certainly wasn't lucky.
Wednesday, March 25, 2009
Tuesday, March 24, 2009
Blast From the Past - A Canoe Earns a Name
When I was a kid, my father never had a canoe of his own - they were always borrowed from someone else when we used them. My mother decided one year to get my father his first canoe. She went down to the local sporting center and picked one out. It was a bright yellow 16' Lincoln fiberglass canoe with a black interior much like the one in the picture below. My mom was very happy with the color, mostly, and my dad was very happy with the canoe itself. As a matter of fact, my father still has the canoe although sadly, we haven't paddled it in years as there are too many other canoes in his livery to choose from. This past winter, we moved it out of the basement of my grandparent's old house for the installation of a new furnace and put it back a few weeks ago.
I remember several things from the first time I paddled the canoe. It was:
We belonged to a Boy Scout troop and had planned a canoe trip to the Grand Lake Stream area in Maine. One of the parents of a fellow Scout has a cabin at the south end of Third Machias Lake and we were to start the trip there. After dinner at the cabin, my father and one of the other Assistant Scout Masters decided to go for a little paddle. With the bow of the canoe in the sand of the beach, this fellow made his way to the back of the empty canoe, crouched low, paddle in hand making his way along the center of the canoe to the stern. He managed to turn and sit down on the seat. He made one sudden move to adjust himself on the seat and the next thing we knew he was in Third Lake's frosty water and came up spluttering.
"THAT @#*$&! KEEL-LESS WONDER IS A HAZARD!!!"
And, keel or no, the name was cast in stone.
The Keel-less Wonder.
I should point out the fact that the Overboard Brothers happened to be paddling the Keel-less Wonder on the day they went into the drink.
I remember several things from the first time I paddled the canoe. It was:
- Fast (Hot rod fast - for a canoe.)
- HOT! (The interior is black, like the one above.)
- 'Slippery'
We belonged to a Boy Scout troop and had planned a canoe trip to the Grand Lake Stream area in Maine. One of the parents of a fellow Scout has a cabin at the south end of Third Machias Lake and we were to start the trip there. After dinner at the cabin, my father and one of the other Assistant Scout Masters decided to go for a little paddle. With the bow of the canoe in the sand of the beach, this fellow made his way to the back of the empty canoe, crouched low, paddle in hand making his way along the center of the canoe to the stern. He managed to turn and sit down on the seat. He made one sudden move to adjust himself on the seat and the next thing we knew he was in Third Lake's frosty water and came up spluttering.
"THAT @#*$&! KEEL-LESS WONDER IS A HAZARD!!!"
And, keel or no, the name was cast in stone.
The Keel-less Wonder.
I should point out the fact that the Overboard Brothers happened to be paddling the Keel-less Wonder on the day they went into the drink.
Monday, March 23, 2009
Maine Boatbuilder's Show Log
A beautiful Herreshoff BB15 by the front entrance
I enjoy the opportunity to go to boat shows because they are a great opportunity to learn new things and see new products. They are also a good time to connect with new faces and to re-connect with old ones. The Maine Boatbuilder's Show which is held at Portland Yacht Services on Fore street in Portland is no exception. I find that the size of this show is particularly focused and manageable. I also find this show impressive for one other reason. The weekend before the Boatbuilder's show, the same facility hosted the Portland Flower Show. In one week, they clear the place out again and proceed to fill it up with all of the boats and equipment that are on display. This has to be a logistical nightmare for the people who manage the show. Consider the fact that boats ranged in size from itty bitty paper boats (A kid's paper boat kit at the Norse Boat booth) all the way up to the 65' Lion's Whelp which was in the rear-most part of the facility. If you don't bring them in in the right order, you'd never get them in!
Because I teach on Saturday mornings, I never get to go to the show on Saturday.
Bummer.
I try to get my students to come to the show as sort of a field trip. I think it's interesting for them to see the joinery and get ideas for their own boats and to see what is possible with a bit of skill and imagination. For most, the trip is quite an eye-opener. To do this trip, we meet at the school very early on Sunday morning to put away the boats from class the day before. We were at the school at about 6:00 AM and hit the road about a half-hour later to make the Kamikaze run I described in yesterday's post. We stopped along the way for breakfast at the Lucky Logger's Landing in Saco, Maine just off Route 1. A nice treat. The Hash Benedict seemed to be a popular item.
We parked over near Hamilton Marine and walked into the building. Dan Noyes had a boat outside on display and Devon Yawl with a dark blue hull was on the other side of the entrance. The buildings are a series of old brick mill buildings of massive scale and a level of disrepair that is appropriate for their age.
There is a great deal of variety at the show in terms of both boats and what vendors have to offer. Construction methods for the boats vary from the most traditonal methods and materials to the downright space-age. Awesome stuff in almost all regards.
Here's a few pictures to whet your appetite for next year:
A traditional cedar on oak sailboat with a lovely octagonal bowsprit and curved laminated spars.
Jerry Stelmok and Bob Volock of Island Falls Canoe with Jerry's Atkinson Traveller on the bottom and a restored Old Town on the top rack. Great folks at this show. Perhaps I'm a bit biased with the canoes, but these were among my more favorite boats at the show. Nick Schade of Guillemot Kayaks was also there with his Nymph in a 10' and 12' length and one of his kayaks. Also nice work.
I got the pleasure of running into Karen Wales and Tom Jackson of WoodenBoat Magazine who I got to meet last summer when I was teaching up there. Wonderful people.
A Herreshoff 12 1/2. A beautiful daysailer and one of the boats used for sailing classes at the WoodenBoat School.
BIG power. There were lots of powerboats in the rear two buildings. They are primarily "picnic boats" or day use powerboats. There were also some which were laid out for overnight cruising as well. Not my cup of tea, personally, but still some beautiful boats with outstanding workmanship.
Brion Rieff's Annie, a Herreshoff Sadie design - arguably one of the most beautiful boats at the show. I'm not sure if I've got this right, but if I recall correctly, she was built in about three months!
A fairly faithful reproduction of Rushton's Sairy Gamp in cedar lapstrake over elm ribs. This boat is not a model, but a full-size canoe at 9' long and weighing in at about 10-1/2 pounds. Note the lack of gunwales, thwarts and seat and the tiny breasthooks. They have not been forgotten - this is the way she was originally designed.
The Shaw & Tenney Booth. They make absolutely beautiful single and double paddles and oars. If you are in the market for a beautiful wooden paddle or oar and don't plan on making your own, I would make these guys my first stop.
A very uncrowded view of the second floor taken by Tim Whitten of Marlinespike.com before the start of the show. Be sure to check out Tim's beautiful custom ropework. It's a treat.
After we had had a pretty good look around, my students wanted to take a quick visit over to Hamilton Marine for some tools and supplies for the canoes that they are building. As we exited the building, it was plain to see that it wasn't spring yet in Portland. We were greeted by a squall that was driving both snow and all of the grit off of the parking lot into our faces as we made our way to the store.
A required stop at the Great Lost Bear for an early dinner and a brew or two from their wide selection of well-kept beers rounded out our day before hitting the road for the long ride home.
A long day, but a great one!
Sunday, March 22, 2009
Kamikaze Run
Having survived the Kamikaze one-day round-trip to Portland, Maine to take in the Maine Boatbuilder's show, I must say that I'm a bit exhausted. I was hoping to write up a review tonight, but I'm afraid you'll have to wait until tomorrow for pictures and commentary!
Thursday, March 19, 2009
Maine Boatbuilders Show
Another sign of Spring is the Maine Boatbuilders Show. It opens tomorrow and runs through Sunday at Portland Yacht Services in Portland Maine. There are a large variety of vendors and suppliers as well as the builders themselves. For a list of exhibitors, please look here. In addition, there are also good seminars on a wide variety of boating subjects hosted by the Marine Learning Center.
For those of you who aren't lucky enough to go to the show, I hope to have some postings with pictures from the show to share with you next week!
Wednesday, March 18, 2009
Tuesday, March 17, 2009
Tech Tip Tuesday
This post will be a little anti-climactic based on last week's post. Now that we've cut the second panel, we bevel it in the same way that we did the first panel. We do this very slowly, however, to make sure that the panels mate closely all along the length of the joint. At this point, we don't want to take off too much material. There will be a point where the panels touch, but they aren't sitting down on the forms. As you push down on the panels, they spring back. This means that you still have material to remove. When the panels fit tightly, and don't spring back, you're ready to glue the panels.
Glue all three joints - panel to hull at both turns of the bilge and along the keel. You need to work quickly, but don't rush. Sometimes you need to push up on the panels from underneath to make sure that the joints are all flush. This is important. You don't want mis-matches. This is the point where my earlier post about inner tubes comes into play. We use inner tube as clamps to hold the panels in place. The blocks that you see under the tubes are used to put more pressure where we want it to close up small gaps between the panel. The ability to customize where you put pressure is very nice. The one thing you want to be careful of is to locate your inner tubes at the stations so as not to crush the hull.
Now, all you need to do is to be patient and let the glue cure.
Sunday, March 15, 2009
It's Spring!
How can I tell?
Ok, there are a few clues here and there. While it hasn't been warm enough yet for the crocus in the picture above, it shouldn't be too long before they arrive.
The first was last yesterday at noon. It was warm enough outside that we could put the canoes away in the barn without worrying about the glue freezing and turning bright white. This did not preclude us from having to go and put away one canoe today, however. (It was coated with epoxy which would have cured very, very slowly and been sticky to move yesterday.) Today was an even warmer day. Ahhh...
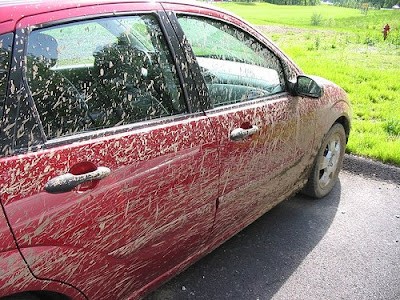
The second came last night. Ignominiously. My DW and I went to a 40th birthday party for a friend of ours which was hosted by his longtime girlfriend. We left the kids with a sitter and drove up to their house in the "hilltowns". They are off a main road in town, but have a dirt (ok, this is an optimistic description...) driveway. This time of the year in the hilltowns is known simply - and rather descriptively - as "mud season". The top 4-6" of ground are somewhere between a slurry and mud-pie. while the bits beneath are still frozen. I'd been to the house before, and knew that I could turn around at the bottom of the driveway. Seeing two trucks parked in the area, I thought it to be safe to drive there, but noooo... Stuck. Needed three people (Including the birthday boy!) to push the car out of the muck. My car was an incredible mess. I took it to a car wash to get the majority of the dirt off, but still had enough dirt left that I needed to wash it by hand. I removed so much dirt, I feel I should be paying my friend rent or something.
The third sign was this morning for a rite of spring. The whole family piled into the car and drove over to a local surgar shack. For those not aware of what a sugar shack is, it's simply a maple sugar evaporator - sometimes there is only the evaporator, but at this particular farm, they serve breakfasts and sell jams, jellies, perserves, baked goods and maple products from syrup to maple sugar. It was wonderful, although we saw more mud again this morning than we would have liked to.
One little update : On Saturday morning, I was scraping the frost off of my car to drive to class. I saw something small flash by out of the corner of my eye and go around the corner of the garage. Being suspicious of what it might be, I went over to the corner of the garage where there is a plastic splash block under the downspout. Lifting the splash block, I saw the source of footprints found earlier in the driveway :
While this isn't a picture of the bulgey-eyed field mouse that I saw, it might as well be. I looked at him and he looked at me for quite a while. When he seemed satisfied that I wasn't going to eat him, he sauntered off at a rather slow pace around the side of the garage to the next splash block. He's probably the only mouse in the neighborhood that hasn't taken up residence in my attic.
Wednesday, March 11, 2009
Tuesday, March 10, 2009
Tech Tip Tuesday
The Football : Part one...
The Football? Ahhh... It's really easy. Look at the bottom of this canoe:
If you were able to look down on the top of the canoe, the opening on the bottom would look like an American football. It's really garboard panels built up from strips.
When my students build canoes, we avoid fitting every single bottom strip in favor of making one mating joint across the center of the canoe's bottom at the keel. There are many, many ways to finish to bottom, but I feel this is the easiest way to do for beginners and gives good results. There are several good reasons - it's easier to make a single straight line and with this method, any issues at the ends of the football are hidden between the inner and outer stems, and it is faster to build.
I usually decide where to start by measuring back about 2" from the end of the inner stems at the keel. If the next strip covers that part of the stem, that's where I'll start. The reason is that the outer stem will come to within about 1" from the end of the inner stem at the keel. This way, the end of the panel is hidden between the inner and outer stem, camoflaging and gaps. On the canoe in the first picture, there were about 3 more strips per side that went on the hull before we started the panel.
You determine where the football starts and leave that strip un-glued, but nail or staple in place as required, and then continue to build one half of the canoe. Mark this first strip with a pencil so you know which one it is. This will be important later.
The remainder of the strips used to build the panel are then glued and stapled into place like the rest of the hull until you've built past the centerline of the canoe. It is imperative to have enough material to cut away at the centerline. Don't skimp - add another strip if you're close:
Before removing this panel, the glue must cure comepletely. You should also mark the panel clearly to know which end is which and how it was positioned along the length of the canoe. I label the bow and add two hash marks that run over the "dry" joint.
While the panel is still in place, I also reach up underneath the panel and make marks with a pencil at every station to indicate the centerline. On this canoe, the centerline was on the other side of the patterns.
Now that the panel has been marked, remove all of the fasteners that held the panel in place while you were building it. Remember the mark you made to indicate the first "dry" strip? This is when it becomes important! You don't want to remove fasteners from the rest of the canoe yet, just the bottom panel.
After the first panel is removed, repeat the steps above, and build another panel on the other side of the canoe.
We will then build the second panel the same way as the first panel marking the panel orientation and position, but not the centerline. When the panel is dry, remove the fasteners to the first dry joint and remove the second panel.
Now, you can connect the centerline marks and cut on your first panel. Using clamps and a batten, position the strip on your centerline marks and make a continuous line in pencil. Be aware - the panel may have flattened out slightly after removal from the hull and the line may not be perfectly straight, but deviates a bit at either end. Don't worry about this much.
The centerline marked on the first panel:
At this point, we'll cut the panel about 1/8" proud of the line using the bandsaw to remove a majority of the waste from the panel. We then dry-fit the panel on the hull and holding a small plane with the sole vertical, we cut small sections of the panel close to the marked centerline at the appropriate bevel angle. This will help act as a visual guide to get the correct angle for the rolling bevel cut on the panel.
Then, with the panel in a vise, we plane the panel's rolling bevel to match the small test patches and down to the centerline. Be sure to plane from the center of the panel towards the ends of the panel to avoid splitting the strips along their grain. This is very important. Also, use the plane with the longest sole possible to get a good, straight line.
Now that you've trimmed the first panel, put it in its' proper location on the boat and put the second panel in place as best you can. Reach underneath and scribe the first panel's edge on the second panel. Use the batten to mark the second panel in the same way as the first. Cut on the bandsaw again, but leave 1/4" minimum for waste. When done, it should look like this:
To be continued next week.
Monday, March 9, 2009
Spring is coming. Really.
This weekend's weather in the 60's was just a teaser to those of us in New England, but it was still a nice treat. One of the other treats that came this weekend were the Red Winged Blackbirds who had just returned for the year. We've got a wetland behind our house and it's on the migratory path for lots of birds, but the return of the Red Winged Blackbirds are a special treat because they let me know that it's almost paddling time. I say that because I like to paddle in some small backwaters loaded with these birds and their trilling call always seems to accompany a nice paddle.
Ironically, when I woke up this morning, my clock-radio was playing a piece on NPR by a local naturalist about these birds. I learned a few new things about them. First, they are among the first migratory birds to return to our area in the spring. Second, their call varies by locale - they seem to have regional "dialects".
The rude awakening came when I got out of bed and looked out the window and saw large wet snowflakes falling.
Spring IS coming, isn't it?
Thursday, March 5, 2009
Wednesday, March 4, 2009
Tuesday, March 3, 2009
More News du Jour...
One of my students and his wife were recently published in A Distinctive Style, an on-line magazine with both a very "green" publishing method (basically a "flash" format) as well as very "green" content.
The boat that he built was unique and beautiful and he took advantage of the skills that he developed in a furniture making class at the school where I teach to add hand-made inlay to both the decks of the canoe and the paddle, which he also made.
Please be sure to check out their work on pages 60 and 61 and 76.
News du Jour...
Thanks for the award, Almost American!
"According to the authors of this award, this blog invests and believes in the PROXIMITY - nearness in space, time and relationships! These blogs are exceedingly charming. These kind bloggers aim to find and be friends. They are not interested in prizes or self-aggrandizement. Our hope is that when the ribbons of these prizes are cut, even more friendships are propagated. Please give more attention to these writers! Deliver this award to eight bloggers who must choose eight more and include this cleverly-written text into the body of their award."
I'll be giving my eight bloggers a little thought and posting my choices in a week or two!
Monday, March 2, 2009
François Rothan's Birchbark Canoes
I am always intrigued to see a beautiful canoe or for that matter, a beautiful paddle - a Malacite design chip-carved paddle above. François Rothan builds birchbark canoes of incredible beauty. One of the more interesting things on his blog is this video of the building process for a Algonquin style birchbark canoe. I've added his blog to my list of favorites and look forward to new postings by him.
Sunday, March 1, 2009
A very productive day!
The class that I teach uses a workshop that is shared with a variety of other woodworking classes. The class I teach is a 3-1/2 hour long session on Saturday mornings. Because of the fact that we share the shop, we need to store the boats being built in a barn on the school's property. It usually takes us about 20 minutes at either end of the class to move tools, stock and boats in and out of the shop at either end of the class. In mid-winter, we have to come back on Sunday mornings to put the canoes back into the barn. We cannot put the boats back in the barn on Saturday because the glue used to bond the strips will freeze and turn bright white and any epoxy that is being applied will not cure because of the low temperatures.
C'est la vie.
Every now and again the class I teach has a "double session". We start at our usual time and have a break for lunch and continue for the rest of the afternoon. The big advantage is that save probably about an hour of class time that is usually spent moving boats and gear back and forth. The side advantage is the lunch. We either order something out or have a "pot-luck" meal. The camaraderie of a full day is really great, to be quite honest. My classes are small and they become a tightly knit group. Often, former students drop in to see what is going on.
This Saturday, we had a double session. It was a productive day in all respects. My two students who are in the process of building a Wee Lassie and Wee Lassie II canoe managed to finish stripping 1/2 of the "football" on both boats and from the feature strips most of the way to the sheer line. Considering the fact that they have been stripping for 4 class sessions, they have made a lot of progress. Here are pictures of their boats:
The student who lost his woodworking shop to fire and his friend who lost his boat in the same incident worked on the Osprey sea kayak and did a LOT of work, assembling the stems, sheer clamp and about 1/2 of the hull stripping in a day. These two students have had a large number of setbacks including the loss of tools, stems and some of the bow and stern patterns for the kayak in the fire. They were both very pleased to finally get stripping the hull and to make the progress that they did. The strip selection was made so that contrasting strips on both sides of the hull are mirrored. He plans to put detail strips on the deck, but the hull will be attractive as well. Here are some pictures of his progress:
On top of all of this woodwork, one of my students was ready to 'glass her canoe. We did this in a warm, clean room above the shop. We managed to do an instructional session for the other students to observe the set-up of our epoxy station, the draping and saturation of the cloth and the trimming of the excess cloth. We also added two layers of 'glass over the stem and stern to finish the canoe. This is probably one of my favorite parts of the class as the instructor because the student finally sees the woodwork "pop". Grain is enhanced and contrasting woods show their beauty. Here's the boat:
It's difficult to see because of the reflection of the lights, but the bottom "football" of the canoe was started with a dark strip and goes lighter in a gradient pattern as it goes towards the keel. This student is also a quilter and she wanted to have a 9-patch built into her feature strip that was reminiscent of her quilting work. A close-up of the detail is below:
A great day and beautiful work by my students!
Subscribe to:
Posts (Atom)