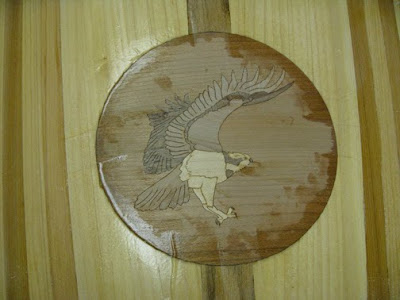
"What are you going to do with that?"
"You tell me.", he said.
Uh huh. Well now. That was unexpected.
"Where do you want to put it?"
"On the front deck - where the hatch will be."
We tried to put it on the front deck, but the curvature was starting to break up the inlay. We finally decided that the back deck was flatter and would allow us to put the inlay centered where the rear hatch would be located.
I teach boat building but don't do much inlay work. Fortunately, the piece of inlay was supplied with a template to allow us to mark the outline of the piece in the picture above.
We used an X-Acto knife to incise the inlay's outline. My father, who is a master cabinetmaker among other things was visiting class and took a chisel to remove deck material to the thickness of the inlay. Here's the template clamped in place with the material removed around the edge. Mind you, the inlay is about 1/32" thick, so we were trying not to make the recess too deep.

A small palm router was then used to remove the remaining material within the perimeter.

We did a quick test fit of the inlay and then tuned up the fit so that the inlay was perfectly flush around the edge. Things were looking pretty good.

Ok. Now what do we use for an adhesive here? At this point I ask my student what else came with the inlay.
"Nothing."
"What about those papers?" Sticking out of the edge of the box were two pieces of paper with instructions for applying the osprey as both inlay and onlay. (Apparently we could have avoided the cutting, but we had already done the deed...) The papers also had the information that I was looking for - bond with un-thickened epoxy. This could have been a big issue. Not all adhesives are compatible - i.e. they will not stick to each other.
We now needed to apply uniform pressure to the inlay as it was bonded. We wanted to press down on the inlay with uniform pressure by wedging down from the ceiling on some foam. I didn't have anything with me as I hadn't planned on bonding inlay in class, so I asked if anyone had any foam. Another student turned this up out of his truck.

Yeah, I'm feeling the heat. Something else for foam would be good, however.
Ultimately, we applied well-mixed un-thickened epoxy to the cut we made in the deck and to the back of the inlay. We put some masking tape on the edges of the inlay so that we could be sure that it wouldn't move around when we clamped it. A layer of waxed paper was put in place to keep the epoxy from bonding the foam used to apply even pressure to the inlay to everything in sight. This is what the clamp-up looked like:

The next day, we went to put the boats back in the barn. Here's the result of our work:

A little bit of clean up of the excess epoxy around the edges will be required and then this will be covered with fiberglass and epoxy. The inlay should look like it is "floating" under the clear layer of epoxy and fiberglass. I'm looking forward to seeing how it will look.


No comments:
Post a Comment