This method has one big drawback. You're only making one feature strip at a time, so you need to do it twice. This is time consuming. You also need to pay attention that the strips are the same (if that's what you want...)
Ted Moores uses this method in his book, Kayakcraft, and makes a pretty "Indian Blanket" sort of pattern using strips of similar widths.
For starters, 'tho, here is a very simple strip:
 Two wide pieces of Spanish Cedar with a narrow strip of Basswood between them. Not difficult and not really time consuming.
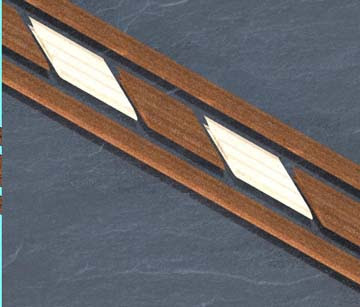
Here is another slightly more complicated strip. It's made from two continuous narrow strips of Spanish Cedar and alternating pieces of Spanish Cedar and Basswood with 30° cuts on the ends. Here are the cut pieces ready to assemble:

And the finished product:

You can change the whole style just by changing the type of wood:

Spruce on the edges would be a completely different look - not my tastes, but it is intended to show what is possible.
You can mix up widths, cut directions, wood species, wood figure, etc. and get all sorts of neat effects. If you stack two rows of the same wood with cuts in different directions you can get arrowheads, diamonds and pretty much whatever you can dream up.
A couple of caveats about this method:
- If you are making a row with multiple types of wood of a particular width - say 1/4" - mill all of this stock at one time. This way, you will not get any nasty gaps after trying to make two separate runs of 1/4" stock that are just slightly different widths.
- Stagger joints. Butt joints or even a bunch of beveled joints that are stacked up will make an area where either the bend of the feature strip isn't fair or there is a weak area. Avoid this.
- Don't make the feature strip too wide. It's fairly easy to build up a feature strip that doesn't want to follow the curve of the hull forms. If you want a complex strip with lots of detail, use narrower strips to achieve this goal.
- Use a "type setting board". This is just a board a bit longer than your canoe and about 5" wide with a narrower strip screwed to it along the length of the long edge. This is then covered with packing tape or wax paper so you don't glue the strip to the board. Basically, you use it to organize the parts of your features strip and then clamp the pieces together when you're bonding the feature strip together. If your board is wide enough, you can stack the feature strips for the left and right side of the canoe on top of each other so that you can make sure they are the same. (Just DONT glue the left and right strips together!)


No comments:
Post a Comment