Ok.
Here goes nothing.
I've had lots on my mind of late. I think it is starting to show in spots.
I've been working on things for my canoe building class and the school in general. I've got things going on at home and would be lying if I said that there wasn't a lot going on at work, too. For whatever reason, I decided that I'd fire up the steam generator and bend some of my cherry I've cut for the coamings on the kayak.
Recalling the canoe building class with Jerry Stelmok up at the WoodenBoat School, I remembered that dry wood - like the mahogany that we used for gunwales, needs to be soaked before steaming to avoid simply tempering the wood and ending up with hot, brittle wood.
For this eventuality, I made some soak chambers from a 2" piece of ABS pipe with threaded caps on the ends. The "steam box" was another piece of 2" ABS pipe.
Before I left for work this morning I had a moment that Click and Clack of NPR's Car Talk would have described as "unguided by the thought process". I wanted to prepare the wood for steaming this evening by soaking it first. So, I took some pieces of cherry I'd cut for the purpose and put them in the tube, filled the tube with water and plugged the end. Simple, right?
Well, I came home form work this evening and had dinner. After dinner, I set up the "steam box" and the steam generator to bend the wood. I then went to the soak tank to extract a few pieces of the wood to steam.
I repeat - I then went to the soak tank to extract a few pieces of the wood to steam.
Nothing was moving out of the tank.
Mental note - don't put too much wood in the soak tube - when wet, it EXPANDS.
A lot.
The pieces of wood were not that tight in the tube, but when I filled it with water, they expanded so much that I couldn't pull them out of the tube.
I did finally smarten up a bit - I used the soak tank as the steam box and when the wood was heated, it shrank allowing me to pull the wood from the tube. The hot wood bent like a noodle.
Thursday, September 16, 2010

Wednesday, September 15, 2010

Tuesday, September 14, 2010
Tech Tip Tuesday
Well, yesterday's post was indeed apropos.
As part of the kayak build, it is necessary to bend some wood for coamings, hatch covers and rims. I've spoken about bending wood before - and canoe ribs specifically - but I'll recap quickly here. You can cut pieces of wood so that they are curved after cutting - often done with crooks or knees so that the grain direction follows the intended curve to yield a strong part. You can laminate thin layers of wood around a curved form like we do with our stems, or you can heat the wood by boiling it or steaming it to soften it for bending.
In my case, I'm bending long strips about an inch wide at their widest and about 8 feet long. The stock cannot tolerate the tight bend that I'm contemplating for any of the parts. I tried one method that I've seen used successfully - taking a damp T-shirt and steam iron to heat the strips (because they are s thin) and bending them around the forms. This didn't work too badly, but my scrap rate was a bit high for comfort. (The rims are going to be cherry!) I decided that I'd better bite the bullet and just steam them.
Alas - no good way to create steam. Time to make one.
I like the brute force behind a propane fired steam generator (think large kettle on big propane burner with 100 gallon propane tank and regulator), but don't want the expense or safety issues associated with a set-up like they have at WoodenBoat. I decided that an electric steam generator would work best for me. I'd seen some that I liked. Here's my first cut:

First, before thinking of undertaking this type of project, be sure to know and understand what you're doing - it can be dangerous if you are not careful. Live steam, electricity, flammables and other hot parts can hurt your badly or even kill you if not treated with respect. Details are important - like choosing the correct wire gage for the cable, proper grounding, avoiding electric shock and not creating a sealed area where dangerous amounts of pressure can build up. Think before doing.
I've shown part of the steam generator before, but let me describe it a bit. What we have is a frame to support the apparatus and on the left is a bucket which gets filled with water. (both for feeding water and counter-balance - note that the feed on the pipe is higher than the bucket's bottom) on the bottom of the bucket is nipple which lets the water feed into the high-temperature black heater hose, through a ball valve, and into the "T" on the pipe assembly to the right. Located in the pipe at the bottom is a 1500 watt electric hot water heater element. I was very careful to ground the pipe with the cable and to cover the connections with a silicone cover to isolate them from water and to prevent electrocuting the operator. I also located the element at the bottom to avoid boiling it dry - I've seen similar steam generators with elements in the "T" and fed from the bottom. The water is boiled in the tube and expands as steam exiting at the top brass fitting and into another piece of heater hose which is held in the steam box with a rag.
Because of the length, this presented some issues. I picked up some ABS pipe to use as both a soak tank (wet wood steams better...) and another piece for the steam box.
It's all R&D.
Lessons learned? Yup. Bigger diameter pipe would have been better. First, it would have created a larger surface area making more steam. Second, the expanding steam wouldn't push the hot water up the relatively narrow column; I'd started with some shorter pipe, but the expanding steam pushed hot water up and out of the top of the device - like Old Faithful! That's one of the reasons that this is such a tall device - this one is about 3-1/2" tall. I'd also make a more robust custom cap for the bottom to protect the electrical elements.
- Red Green
As part of the kayak build, it is necessary to bend some wood for coamings, hatch covers and rims. I've spoken about bending wood before - and canoe ribs specifically - but I'll recap quickly here. You can cut pieces of wood so that they are curved after cutting - often done with crooks or knees so that the grain direction follows the intended curve to yield a strong part. You can laminate thin layers of wood around a curved form like we do with our stems, or you can heat the wood by boiling it or steaming it to soften it for bending.
In my case, I'm bending long strips about an inch wide at their widest and about 8 feet long. The stock cannot tolerate the tight bend that I'm contemplating for any of the parts. I tried one method that I've seen used successfully - taking a damp T-shirt and steam iron to heat the strips (because they are s thin) and bending them around the forms. This didn't work too badly, but my scrap rate was a bit high for comfort. (The rims are going to be cherry!) I decided that I'd better bite the bullet and just steam them.
Alas - no good way to create steam. Time to make one.
I like the brute force behind a propane fired steam generator (think large kettle on big propane burner with 100 gallon propane tank and regulator), but don't want the expense or safety issues associated with a set-up like they have at WoodenBoat. I decided that an electric steam generator would work best for me. I'd seen some that I liked. Here's my first cut:

First, before thinking of undertaking this type of project, be sure to know and understand what you're doing - it can be dangerous if you are not careful. Live steam, electricity, flammables and other hot parts can hurt your badly or even kill you if not treated with respect. Details are important - like choosing the correct wire gage for the cable, proper grounding, avoiding electric shock and not creating a sealed area where dangerous amounts of pressure can build up. Think before doing.
I've shown part of the steam generator before, but let me describe it a bit. What we have is a frame to support the apparatus and on the left is a bucket which gets filled with water. (both for feeding water and counter-balance - note that the feed on the pipe is higher than the bucket's bottom) on the bottom of the bucket is nipple which lets the water feed into the high-temperature black heater hose, through a ball valve, and into the "T" on the pipe assembly to the right. Located in the pipe at the bottom is a 1500 watt electric hot water heater element. I was very careful to ground the pipe with the cable and to cover the connections with a silicone cover to isolate them from water and to prevent electrocuting the operator. I also located the element at the bottom to avoid boiling it dry - I've seen similar steam generators with elements in the "T" and fed from the bottom. The water is boiled in the tube and expands as steam exiting at the top brass fitting and into another piece of heater hose which is held in the steam box with a rag.
Because of the length, this presented some issues. I picked up some ABS pipe to use as both a soak tank (wet wood steams better...) and another piece for the steam box.
It's all R&D.
Lessons learned? Yup. Bigger diameter pipe would have been better. First, it would have created a larger surface area making more steam. Second, the expanding steam wouldn't push the hot water up the relatively narrow column; I'd started with some shorter pipe, but the expanding steam pushed hot water up and out of the top of the device - like Old Faithful! That's one of the reasons that this is such a tall device - this one is about 3-1/2" tall. I'd also make a more robust custom cap for the bottom to protect the electrical elements.
"If they don't find you handsome, they should at least find you handy."
- Red Green
Monday, September 13, 2010
It's all R&D...

If we knew what it was we were doing, it would not be called research, would it?
-Albert Einstein
Thursday, September 9, 2010
Priorities, Priorities

Well, it has been time to get back to work on the skin-on-frame kayaks. While DW would probably question my choice of priorities in working on the boats when I could be doing other things, I've started picking away at the boats again.
When at the WoodenBoat Show this past June, the folks from Chesapeake Light Craft had some nice foot-braces for a very good price. After three attempts at home-made foot braces, I wasn't fully pleased with the results and the plastic ones looked to be a good solution as I had already spent more time than the effort was worth. I did utilize the dovetailed cherry stock from a previous effort to support the foot braces in the frame as shown below.

I've also been working at the deck rigging. It is polyester webbing with brass grommets and screws with Fastex hardware. The shorter pieces shown at the bottm will be used to attach the elastic cord in front of the paddler. Another set that are similar, but with "D"-rings will be sued to hold the seat-back. The longer pieces will be to hold the deck hatch in place.

I've got a bit more to do on the steam box assembly so we can bend the coamings and the hatch frame and cover frame, but that should be my weekend task.
It's on my priority list!
Wednesday, September 8, 2010

Tuesday, September 7, 2010
Tech Tip Tuesday
In my line of work, one often comes upon some unusual engineering wildlife. I think you'd better check out the post quickly as I'm not sure how long the link to the first image will be working:
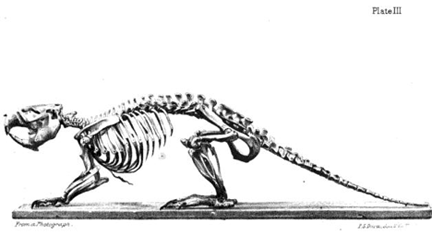
AlumabeaverThe Alumabeaver (Castor Aluminus) is a diurnal mammal; the third largest rodent in the world. The Alumabeaver is characterized by its large flat tail, webbed paws, soft silver fur and tungsten carbide teeth.
Their habitat includes highly industrialized areas and they are particularly fond of machining and manufacturing facilities where their largest food source is to be found. While seldom seen in the wild, these elusive creatures are often known to be in the presence of bad machinists and mechanical design engineers. Their presence can be noted by their tell-tale tooth marks found in aluminum along with chips and shavings. These tooth marks are often mistaken for those of the Bronze Muskrat (Ondatra Zibethicus Brundusinium) and strongly resemble very irregular marks made by end-mills, drill bits and files, but with unusual chatter and inconsistent lay marks. Their presence may also be given away by wet tracks of Tap Magic on floors in the region where shavings used to construct their lodges are found.Alumabeaver TracksThey tend to be solitary animals and their lodges (constructed mainly of shavings, cardboard and small diameter billets that have been gnawed off) are often found adjacent to work benches and built against the side of milling machines. They are not as industrious as their woodland cousins and often do not come out of their lodges unless bad manufacturing or shoddy design is to be found. Their diet consists typically of 6061-T6 and 7075 alloy billets but when food is scarce, they are known to consume 2024 angle.Alumabeaver SkeletonWhile their lustrous silver pelt and tungsten carbide teeth are both very desirable commodities, they are difficult to trap and attempts to do so near their lodges often result in severe cuts to those who try to capture them.


Subscribe to:
Posts (Atom)


 Posts
Posts


